If you’re buying an 80’s Toyota, it’s very likely you’ll scoff at the fact I’m making a guide on doing an oil change. After all, you’ve likely done much more work than just change the oil on your rig. However, this is for those new van owners. When I first bought my van, I honestly had no idea where anything was. For example, trying to find the battery completely befuddled me.
This guide will give you the tips and parts you’ll need on hand to accomplish this easy job. I will always recommend a full synthetic oil – it costs a little more but you can go twice as long before changing it again. Plus if you’re doing it yourself, you can afford a fancier oil and filter than what you’d get a Jiffy Lube.
Parts you’ll need (plus links if you need to buy them):
Tools
- Oil filter wrench
- 14mm wrench (I love Tekton wrenches – good quality and lifetime warranty. Spend the extra for flex-head, ratcheting wrenches. I can’t imagine living without them.)
- Torque wrench (not required, but strongly recommended)
Parts
- Oil filter (I typically use genuine Toyota)
- OEM Toyota oil filter
- K&N oil filter (has a nut on top that makes it easier to get off)
- These Bosch filters are nice as well
- Oil drain plug
- Oil drain plug gasket
- 5qts of 10W-40 high mileage oil (full synthetic – recommended; or synthetic blend)
Shop materials
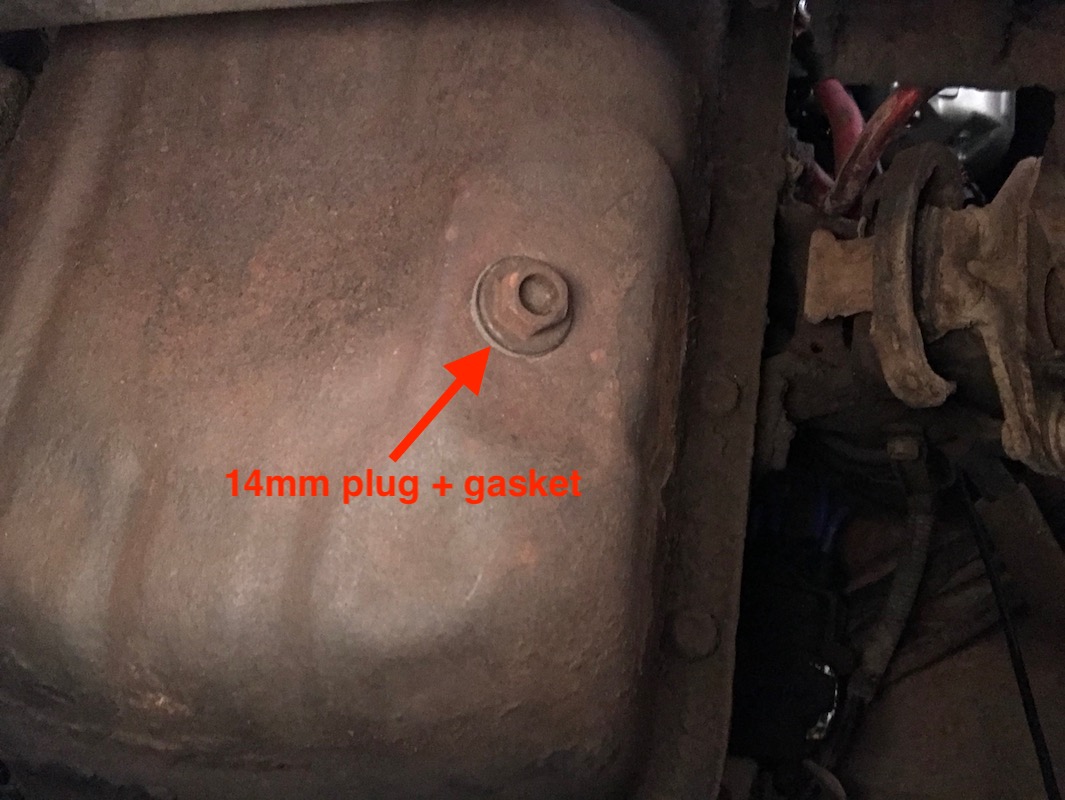
Once you have everything lined up, set the oil drain pan underneath the van and remove the 14mm oil drain plug. Wait a minute or two until it fully drains. Make sure you watch it and move the pan as necessary so you don’t make a puddle of oil all over!
Once it fully drains, you can replace the gasket (don’t ever reuse gaskets unless you want leaks) and tighten the bolt to about 35 ft-lbs.
 Once you pull the plug oil will shoot everywhere. Watch out!
To access the oil filter, pull back the carpet from behind the passenger seat and remove the cover:
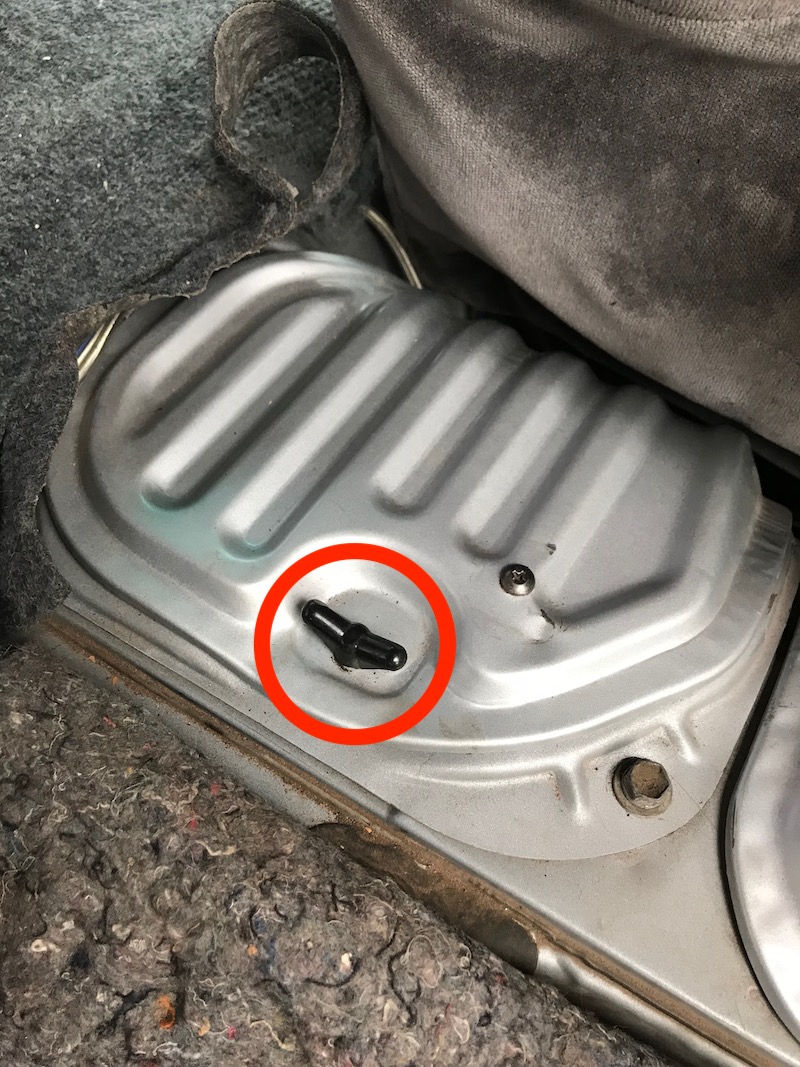 This cover provides access to the oil filter and the power steering fluid reservoir
Next, unscrew the oil filter. It’s a little bit of a pain to get at but you’ll figure out what works for you. I like to keep a shop towel around the base of it to catch the oil that leaks out of it when I’m unscrewing it:
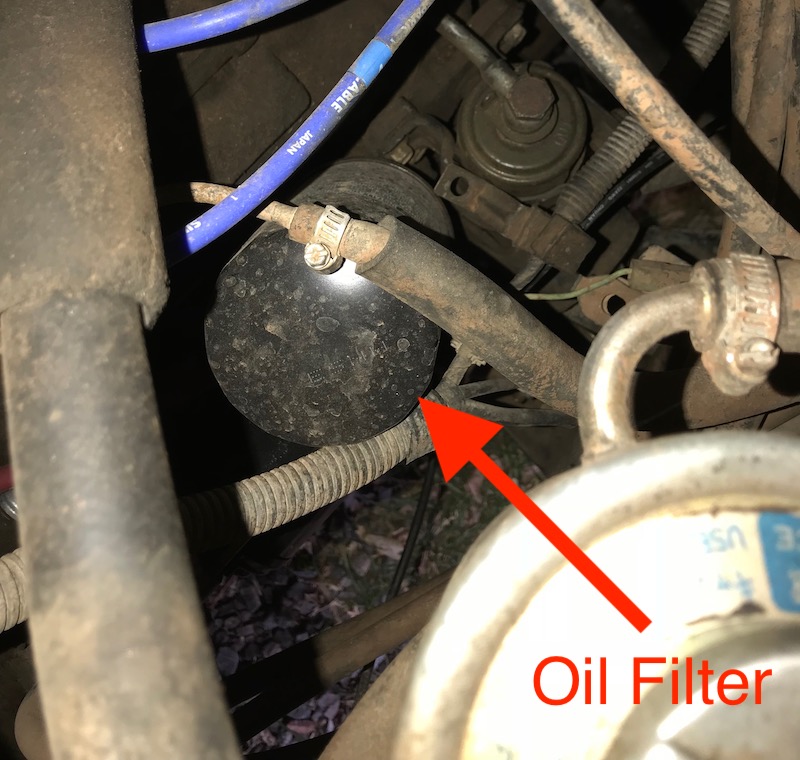 Getting an oil filter wrench in here is a bit tricky!
Once you remove the filter, screw the new filter back on. Be sure to just hand-tighten and don’t over-tighten it. I like to get a little bit of oil and rub it across the rubber gasket on the new filter so it turns easier when tightening and helps prevent the new filter’s gasket from becoming unseated.
Now, once the drain plug is back in, and the new filter seated, you can refill with new oil. I highly recommend sticking with full synthetic oil. Toyota recommends 10w-30, but I use 10w-40 since its full synthetic oil, and the van and engine are old.
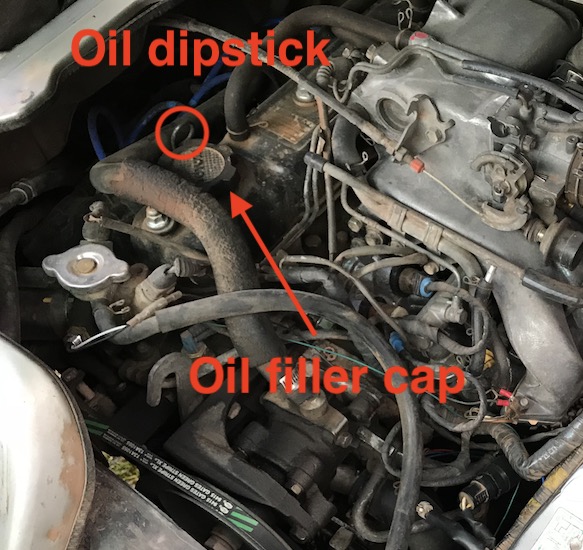
Remove the oil filler cap, and fill the van with oil to the full line on the dipstick. Toyota says 3.7 quarts to refill. I usually do about 3 quarts and then check the level. This helps me from over or under-filling. Pull the dipstick, wipe it, stick it back in, then pull it again and view the level reading. Then fill more if needed, and repeat as necessary. Wipe down any spills with a shop towel and admire your work!
After a couple of times doing this job you won’t think twice about it. You’ll be able to get it done in about 20 minutes, which from my experience is more than half the time I spend waiting in line while getting it changed at a dealer or a “quick” lube shop like Jiffy Lube. Plus, from my experience they get extremely confused by these vans. Doing it on your own you get the satisfaction of saving money, time, and knowing it was done right. The satisfaction gained is ultimately why I love working on my own vehicles so much.
Let me know in the comments if I missed anything or if you have questions!