Credit for the photos and the bulk of this write up goes to skyflyer9 at the toyotavantech.com forum.
Taking apart the Van’s dash is a little bit of a pain, but once you do it a few times, its not so bad. If you work on your own van, I guarantee you’ll end up taking it apart a half dozen times. I’ve done it enough times that I’ve stopped keeping track. You can remove all or part of the dashboard using this guide.
Some common reasons dash removal is required:
- Service or replacing the clutch and brake master cylinders
- Replacing the stereo head unit or dash speakers
- Fixing the broken plastic frame that fastens the climate control levers,
- replacing or servicing the blower motor,
- Replacing electrical switches, including cruise control,
- Pulling up carpet for cleaning or for running new wiring
If a mechanic is doing any work on these components, save yourself a good amount of labor costs by removing the dash yourself beforehand. This job can be done with a couple basic tools like a screwdriver and socket wrench in about 30 minutes.
It is not complicated, but care and organization are required. There are several types of screws, bolts and clips, some of which are location specific. Many screws that hold the dashboard pieces together (and attach the main dashboard to the inner frame) thread into metal retainer clips, but others screw directly into the dashboard plastic or into molded plastic tabs. The threads here strip easily, and the plastic tabs are quickly broken if you are not gentle. Most of this stuff on my van is broken so my dash is only held on by about half the existing bolts and screws which causes some rattling when driving. I was able to fix a couple of the broken pieces using this JB plastic weld putty.
At the time of this posting, many of the screws, bolts, and even clips are still available, which cannot be said for any of the actual instrument panel components.
Tools needed: (remember, using my amazon links helps support the site!)
- Phillips head screwdriver (Made in USA, 8-pc set is perfect for most my needs)
- Ratcheting wrench with 10mm socket (the 45-pc set is a perfect intro set)
- 10mm wrench (standard, ratcheting, or ratcheting flex-head. Flex heads really are worth the extra price people, trust me – I know from experience!)
Tip: one thing that helps a lot before you get into this project is having some scrap paper or sticky notes and pens handy so you can label your little separate piles of screws and bolts in order to make sure everything goes back how it’s supposed to, and none get forgotten or lost. It seems like everytime I put the dash back together I have an extra screw or two hanging around.
Remove the Upper Panel and Instrument Cluster
Removal of what Toyota calls the “instrument cluster finish panel” and “combination meter” will yield access to the brake and clutch master cylinders and the electrical switches on either side of the steering column.
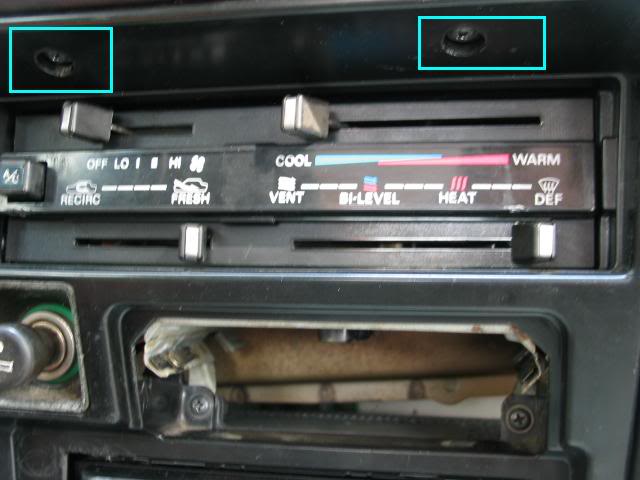
First remove the brake fluid reservoir cap. It makes removing the panel much easier. There are five screws that hold the panel in, as well as two internal clips that fit onto brackets behind the cluster:
To remove the panel, pull it out toward the steering wheel as you maneuver it around the brake fluid reservoir opening (there is enough flex in the panel’s side for that). Pull gently because the panel is still attached by two clips to the brackets seen in the black boxes below:
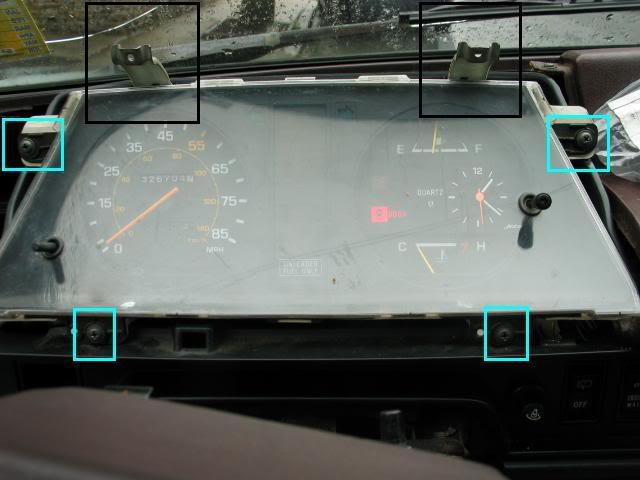
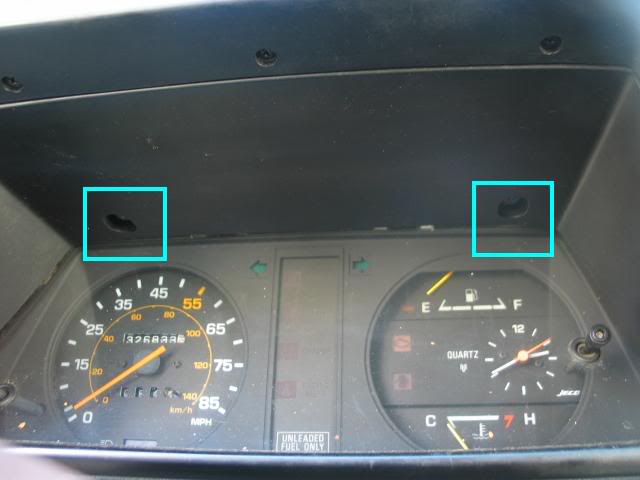
The Combination Meter is attached in the front by four screws seen in the image above, and in the rear by the speedometer cable and three electrical plug connections, seen here:
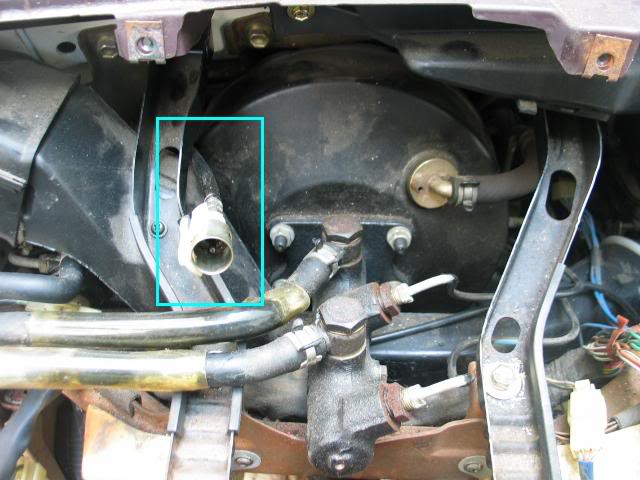
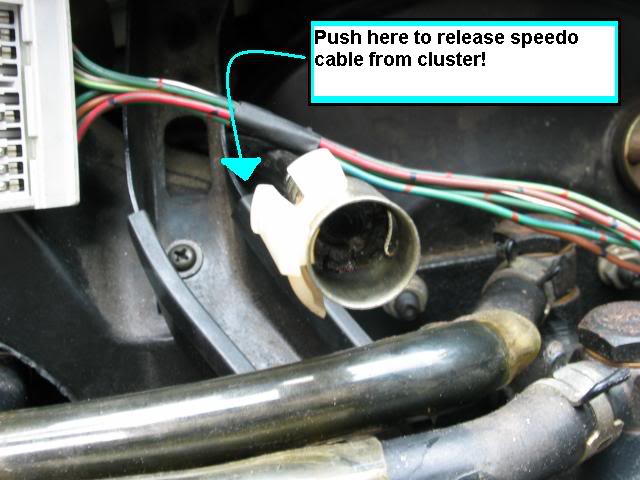
Once the instrument cluster’s front screws are removed, pull the cluster out as far as you can before you feel resistance. First, disconnect the speedometer cable by squeezing the side of the connector and pulling the cable away; it is helpful to look through the windshield from the front of the van to get your bearings. The speedo cable connector comes off easily, but be gentle – if it breaks you’re a little busted. The plastic clip on my speedometer cable was broken so it detached very easily. If yours is this way make sure you snugly push it back in during reassembly otherwise your speedo won’t work and you’ll have to do this all over again (ask me how I know…)
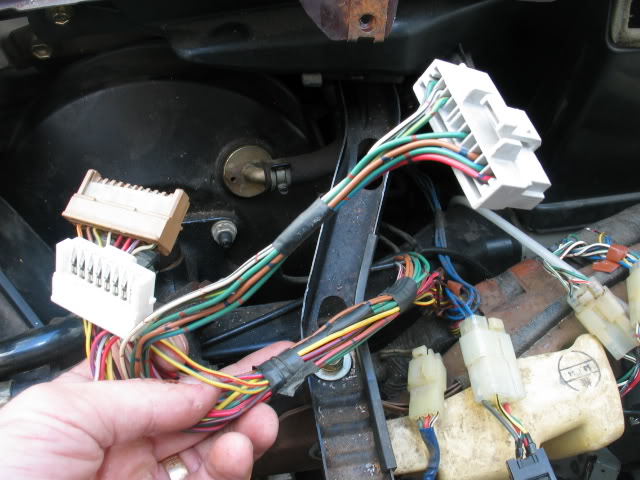
You now have room to pull the meter out farther and disconnect the remaining electrical connectors. Each has a plastic tab that you push in and then pull the connector out.
Remove the Glove Box
Removal of the “glove compartment assembly” will open up the area around the main fuse junction box and the heater blower motor.
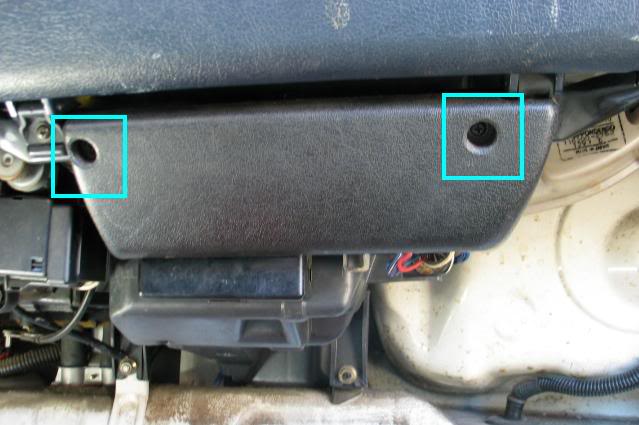
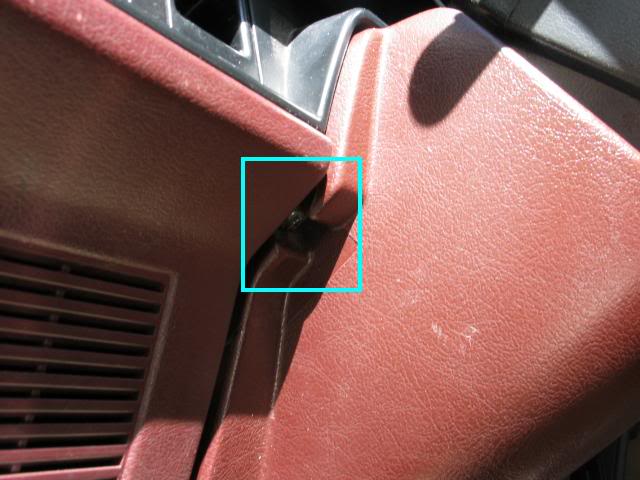
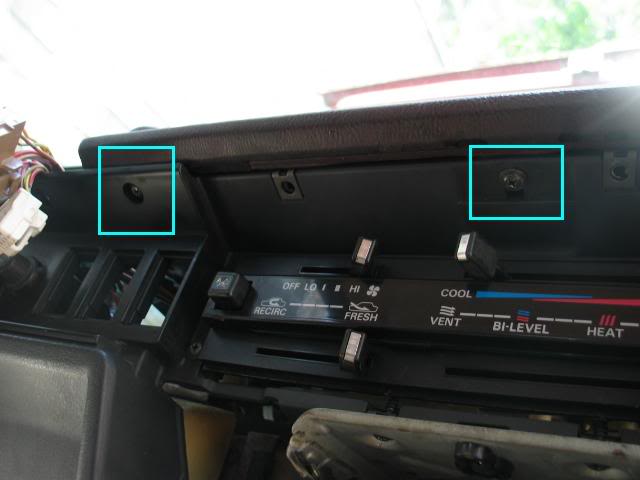
First remove the plastic piece covering the glove box hinges, if it is still there (two screws):
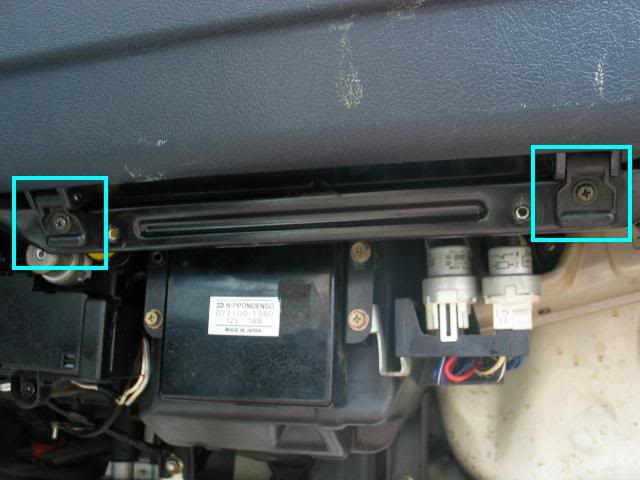
Next remove two screws connecting the glove box hinges and remove the glove box:
If you plan on removing the upper safety pad and/or the main dash, follow the remaining steps in this section. If not, you can stop here.
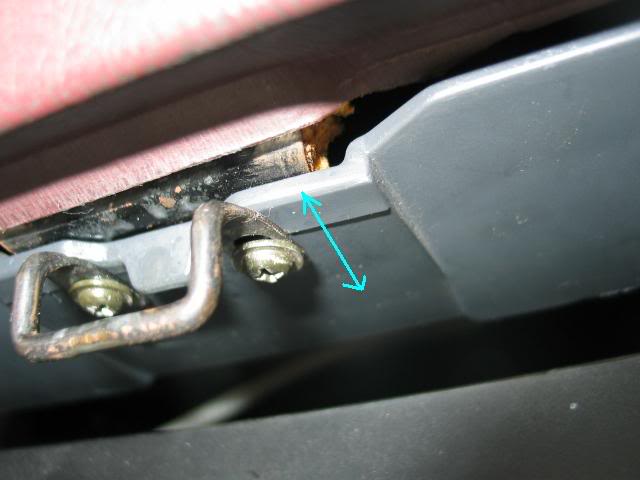
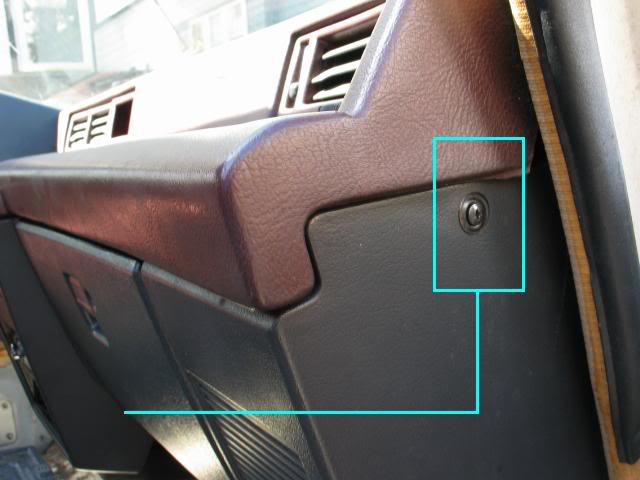
Remove the glove box striker. It is held on by two screws, and can be moved forward or back to adjust the exact point at which the glove box latches. You may wish to mark the position of the striker before you remove it, otherwise you will have to adjust it upon reinstallation. I found readjusting it was easy so i didnt bother with marking it.
Remove two screws (main dash to upper safety pad):
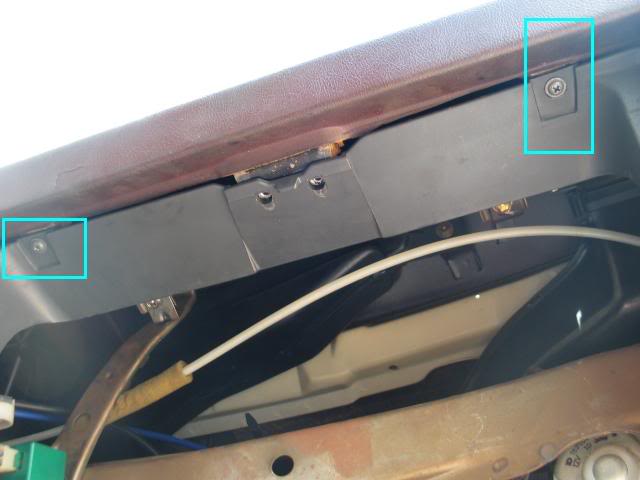
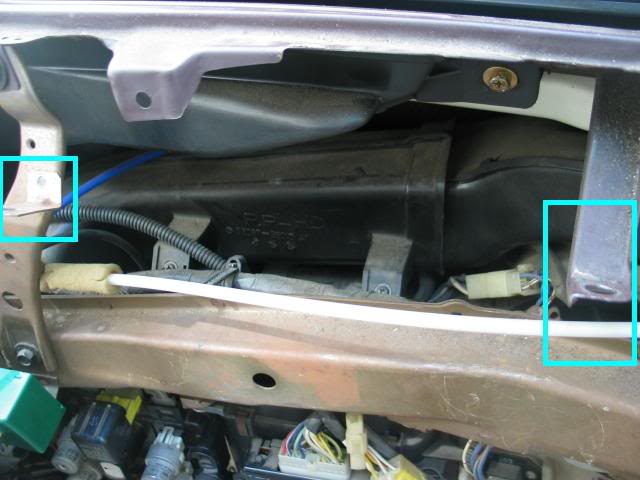
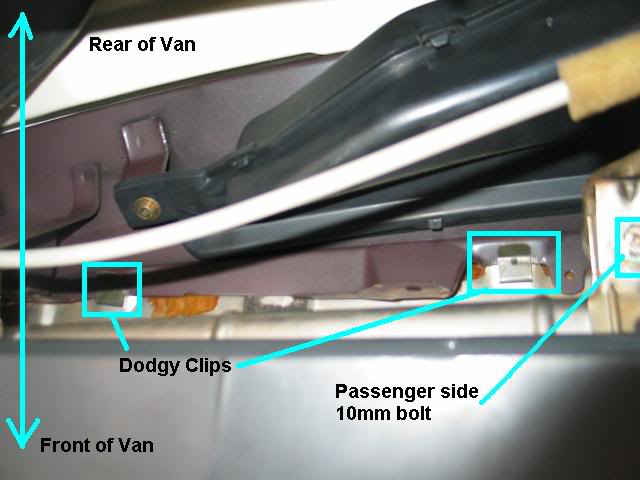
Next remove the reinforcement bar that the glove box hinges screw into. The bar is attached with two screws and two 10mm bolts:
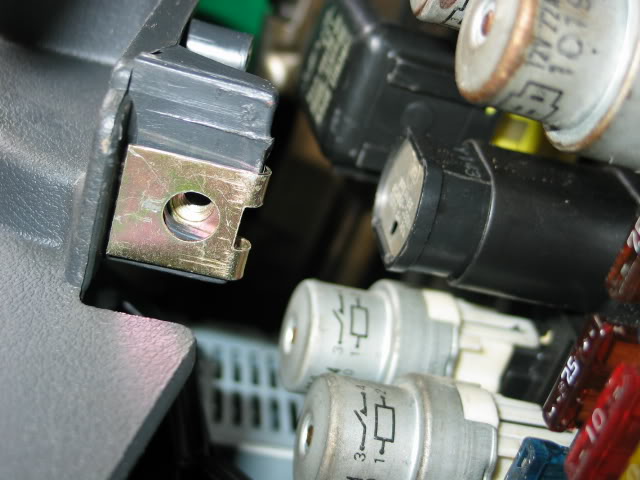
Here is one of the metal retaining clips that the 10mm bolts thread into (this piece snaps onto the dash, and like other clips, may or may not stay there – keep track of them):
Remove the Stereo and Heater Trim Panels
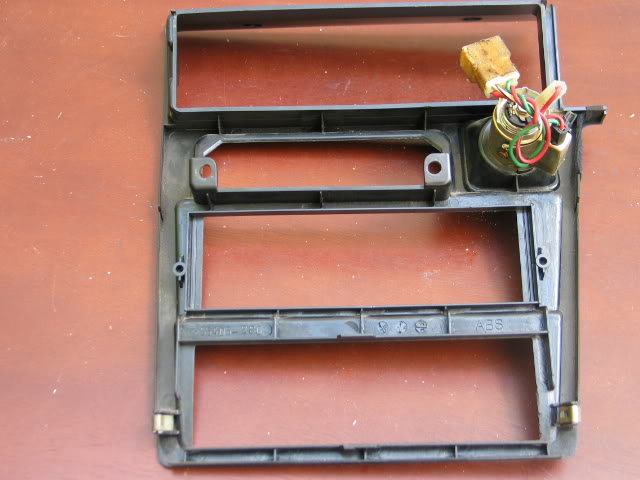
Removal of what Toyota calls the “instrument cluster central finish panel” (the center panel surrounding the stereo and climate controls) will reveal the stereo, more switches, and the heater control panel.
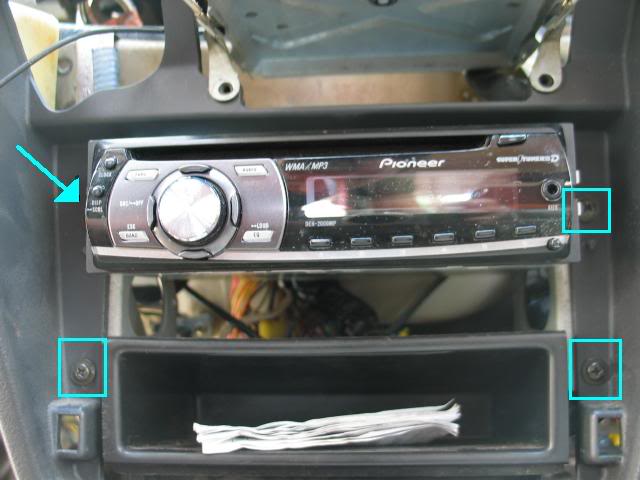
Next, remove these two screws (radio trim to ashtray retainer):
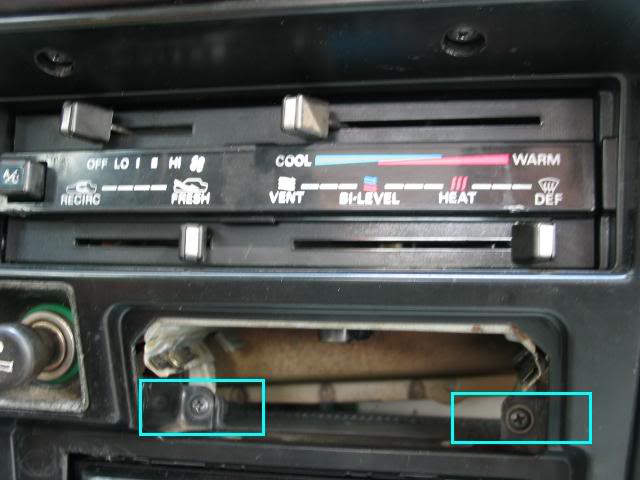
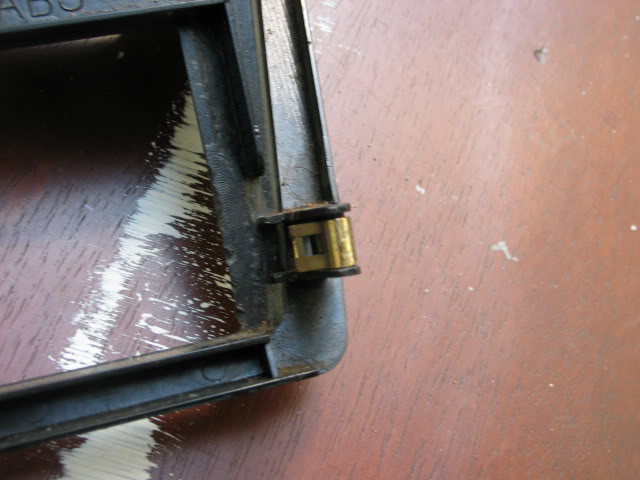
The radio trim panel is still attached by two clips at the bottom corners. Pull out the panel gently as the plastic pieces that the clips snap onto are ultra-fragile…here’s a shot of one of the clips from the backside:
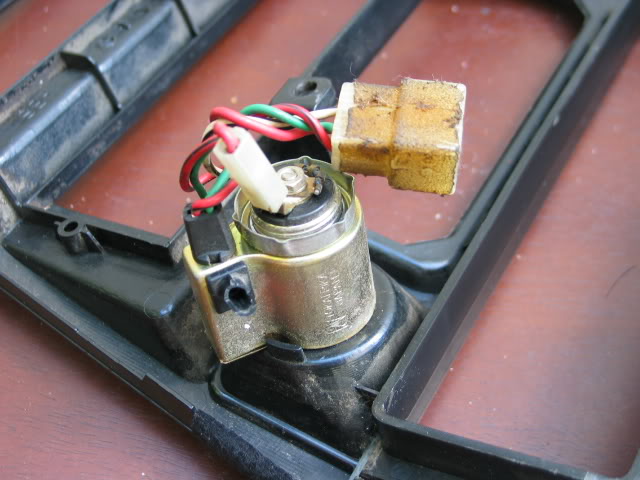
At this point the radio trim panel is only attached by the electrical connector to the cigarette lighter, if you have one. There may or may not be an additional wire running from the roof of the ashtray retainer into the cigarette lighter, if there is, unplug it at the cigarette lighter assembly end.
Next remove four screws around the radio:
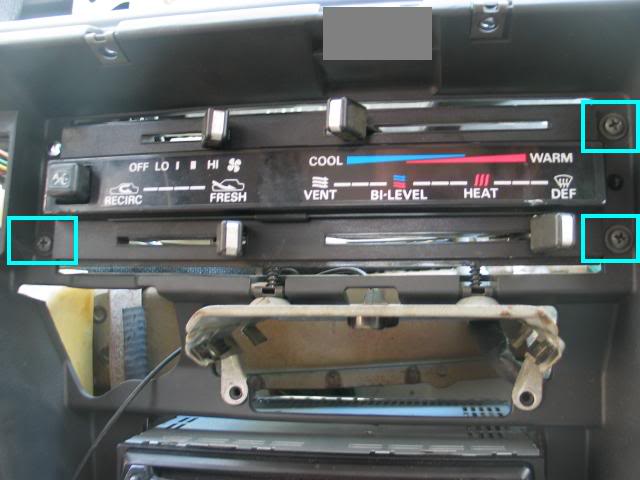
To remove the heater control panel from the dash, remove these three screws:
Remove the Lower Panel and Steering Column Cover
Removal of the Toyota named “instrument panel lower finish panel” and the “steering column housing” will give access to the 4-inch speakers and ignition wiring.
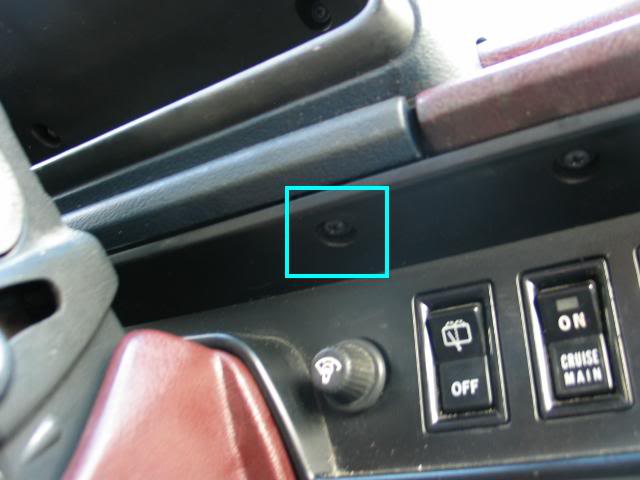
In order to remove the entire dash, the lower panel must be removed. This is the panel covering the lower portion of the steering column. It is attached with four screws…here is a shot of the driver’s side of the panel showing only the driver’s side screw, the second is on the other side:
Lower two screws:

Although not necessary for dash removal, here are the screw locations for the steering column housing (a place to be careful: these screws thread directly into plastic, so take care when reinstalling):

Remove the Dash Upper Pad
Toyota calls this the “instrument panel upper safety pad sub-assy” and it is one of the final pieces to remove. The part I am referring to looks like this:

Remove this screw:
Remove this screw, which is at the driver’s side end of the upper safety pad:
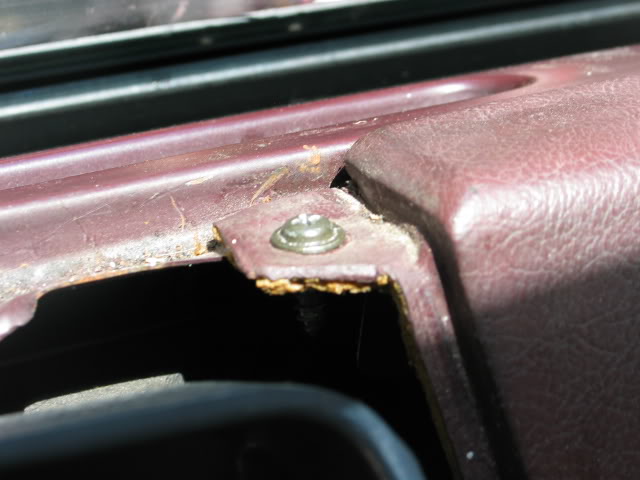
Next remove two screws (dash to upper safety pad):
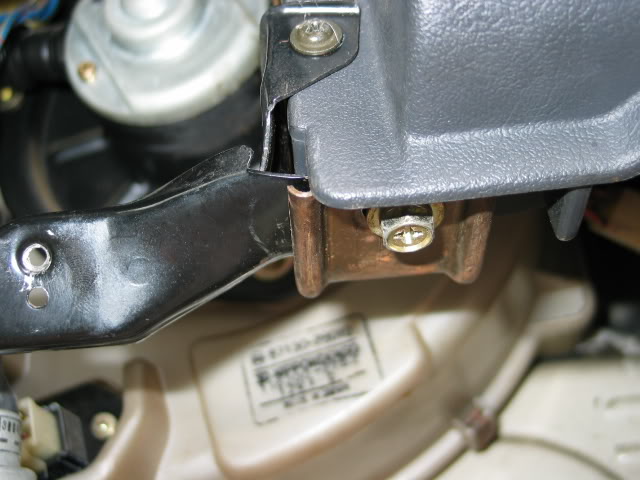
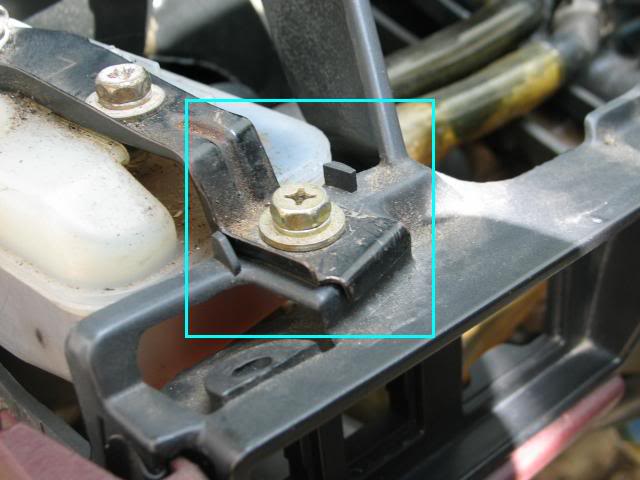
At this point the safety pad is still attached to the frame by clips and by two 10mm bolts, which attach to the brackets seen here:
Once the bolts are removed, pull the safety pad (gently!) from the frame – it is still anchored by two dodgy metal clips that attach to the metal framework at the base of the windshield. Here is a shot from underneath the pad:
In order to remove the last and largest piece of the dash, first remove the electrical switch components from the dash panel.
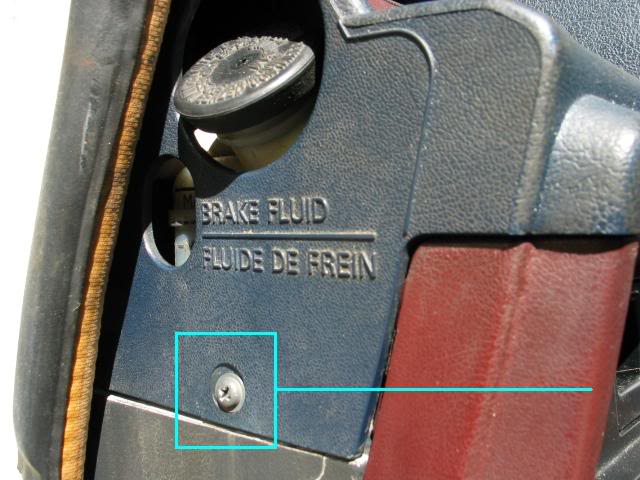
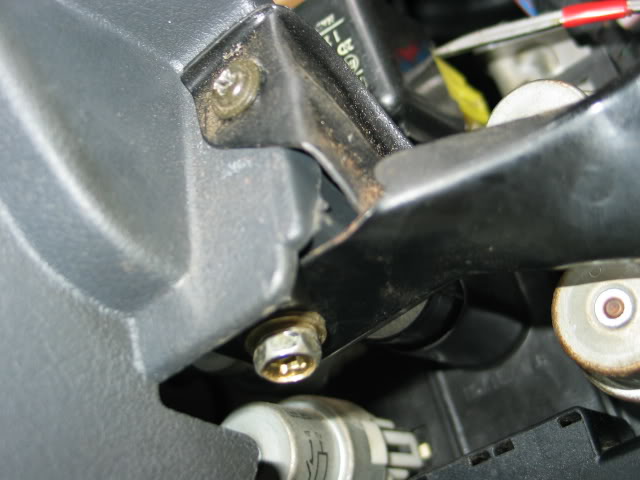
Remove one 10mm bolt below the brake fluid reservoir:
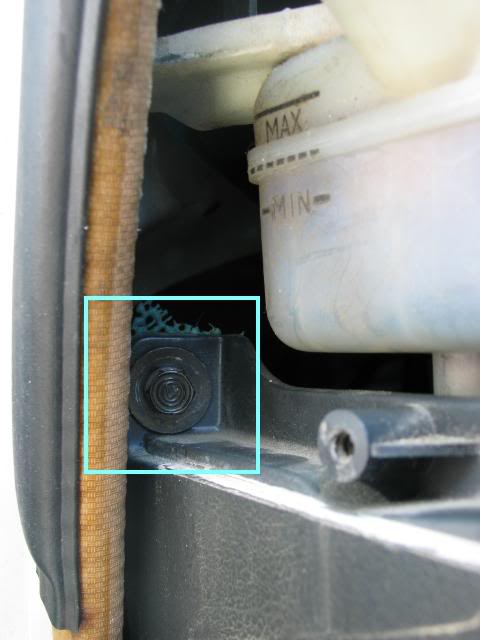
Remove one 10mm bolt anchoring the dash to the bracket which attaches to the brake fluid reservoir:
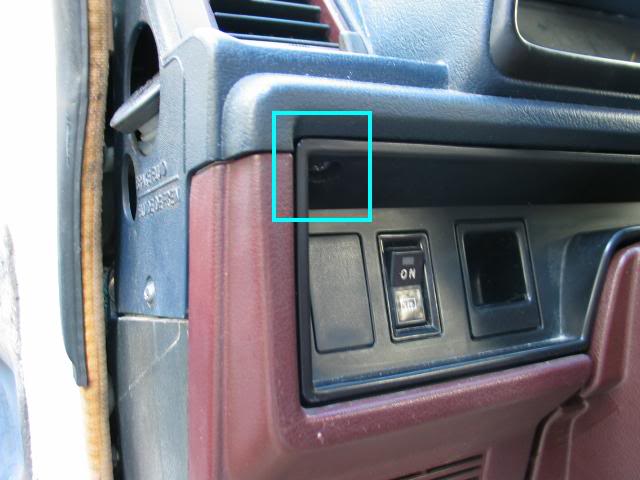
Remove one 10mm bolt that attaches to the very bottom of the driver’s side of the dash (this piece is almost always broken in my experience):

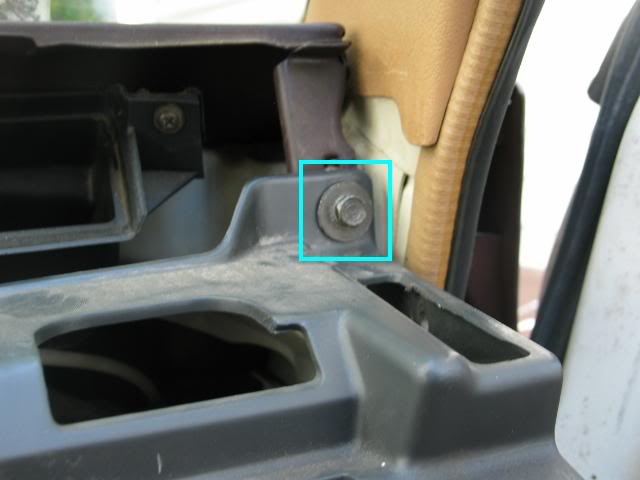
Remove one 10mm bolt near the passenger side door:
The entire dash is no longer connected to the vehicle, and can be removed. Repeat everything in reverse in order to re-install the dash.
Questions, comments, additional input, or having problems? Leave a comment! I’ll try to fill in any gaps or answer any questions if I can!