Why Do I Need a Dash Cam?
Dash cams are great for capturing your trips, especially those off the beaten path, but are probably more widely known for documenting unexpected moments like this meteor falling from the sky in Russia.
They also have a lot of utility as well, giving you protection in case of insurance fraud, hit and runs, and just capturing negligent and criminal behavior by other drivers that can occur when you least expect it. Some dash cams also have the feature of being able to monitor your surroundings with both front and rear-facing cameras, and a parking mode to capture any mischief around your car while you’re away. I find that if you are going to drive any vehicle, no matter how cheap/old/junky it might be, its worth the $50-$100 investment to protect your property and give you peace of mind.
What Do I Need to Buy?
I recently got a this Yi Dash Cam on sale after owning and using the Aukey dash camera in my Prius for a few months. I liked the idea of dash cam so much I tried the Yi Cam this time around for the van. I’ve been happy with both. They are both fairly basic, but excellent cameras for the price. Most entry-level cameras will come with or without GPS and a G-sensor (which locks the file from being overwritten in case of an accident.)
I did several hours of research into different dash cams, so let me save you the trouble and recommend the ones I use, the Yi Dash Cam and the Aukey Dash cam. If you decide you don’t like either of those, I also found a few other detectors you can check out. I also found these to be well reviewed during my research:
- This Vantrue model with dual front and rear cameras and parking mode
- This well reviewed entry-level model by Roav (same company as Anker)
- This stylish VAVA dash cam that has its own mobile app
You’ll also want to pick up a Class-10 MicroSD card. Since the recordings loop and rewrite old files once the card is full, you don’t need anything crazy big. I went with a 16GB SanDisk Ultra. You can also upgrade to a 32GB or 64GB if you feel you want a little more storage.
In my experience the suction cups that come with dash cams work pretty well. The Yi Cam came with a suction cup and hasn’t fallen so far. The Aukey actually included both a suction cup and a mount with 3M tape that is more permanent and secure, so I opted for that one in the Prius. When it comes to mounting stuff I’ve never been a huge fan of suction cups, and always found this 3M mounting tape to be far superior. Theres nothing worse than having stuff fall down while you’re driving, ripping out the wiring with it.
Either way, you’ll want a hardwire kit. Both of my dash cams use a Mini USB plug, and I think this is fairly common. Keep in mind micro-USB and mini-USB are different! You can search amazon for dash cam hardwire kits
If you do a hardwire, you’ll also want to get some fuse taps.
Installation Instructions
Once you have your dash cam, windshield mount, hard wire kit, and fuse taps, you can begin the installation. On mine, I started by mounting the radar detector in the location I wanted. I mounted it slightly right-of-center in order to have room for my radar detector as well.
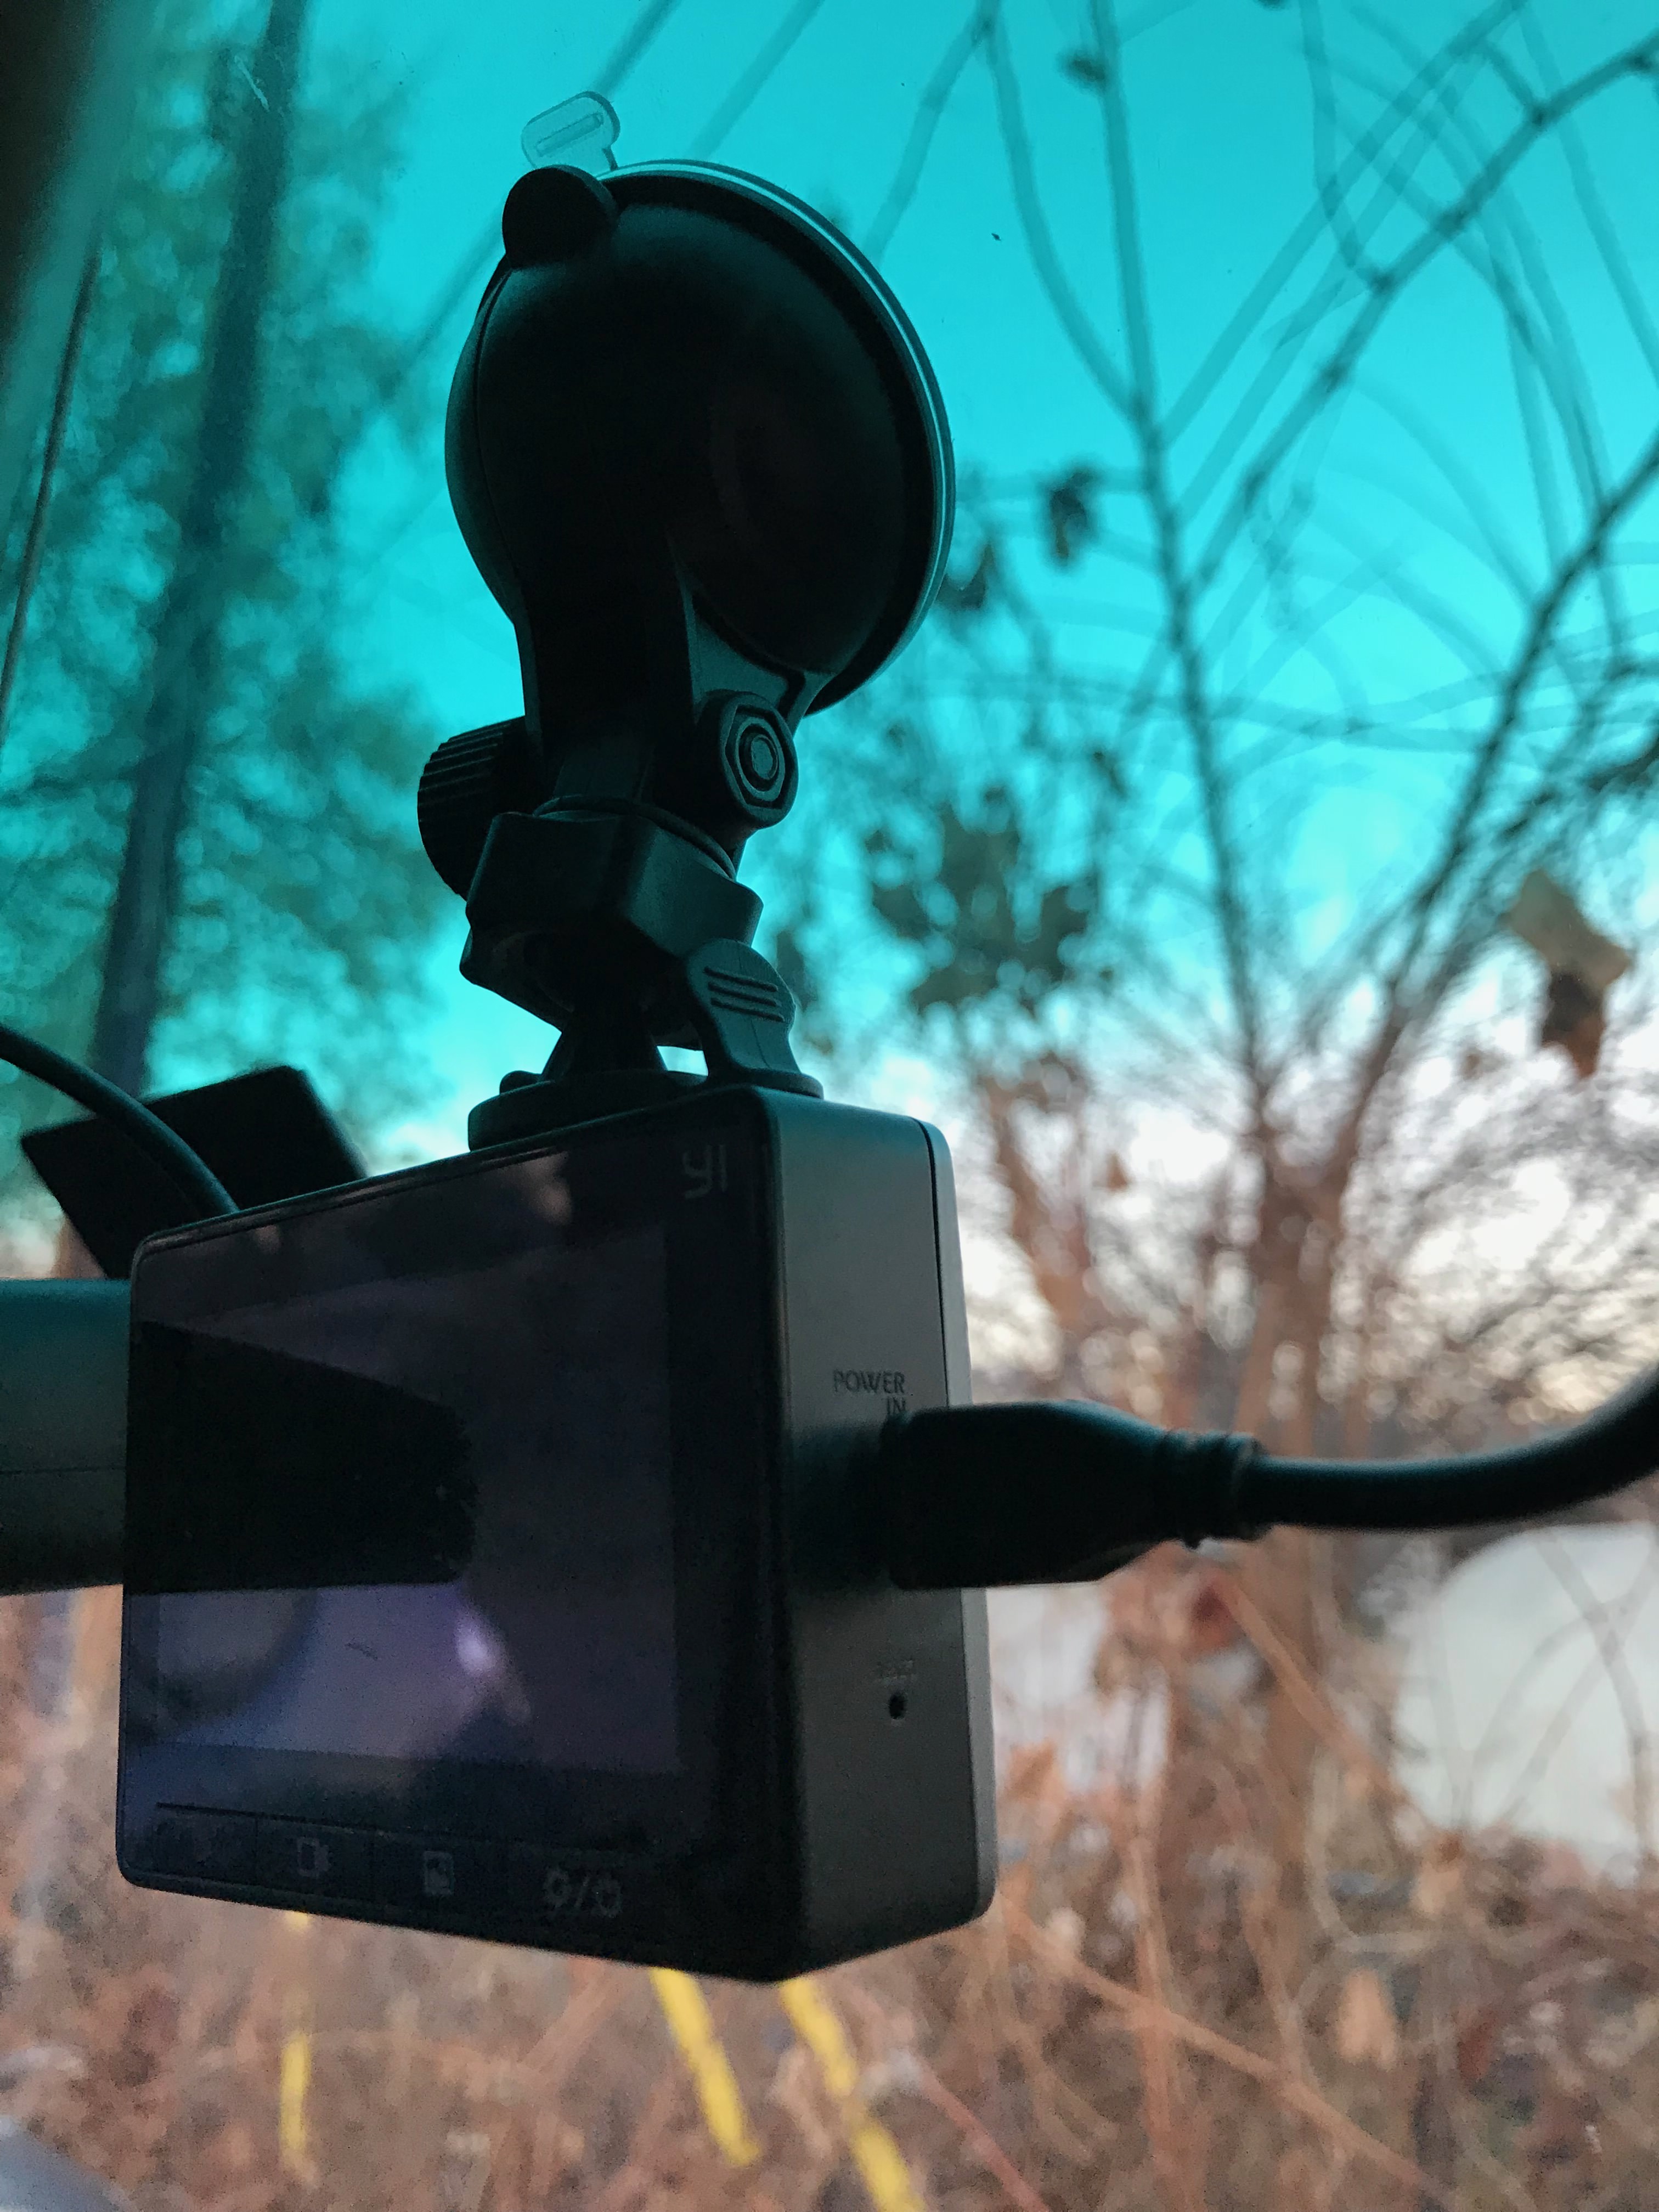 Dash cam with the radar detector partially visible to the left.
The only thing I’d say is make sure you can still flip your sun visor down without the dash cam blocking it. if you go too high/right it will block your passenger sun visor, and if you’re using 3M tape, once you stick it on the glass it’s really hard to get off without ruining the tape!
Now you can start tucking the wire away in the rubber stripping that the headliner tucks into:
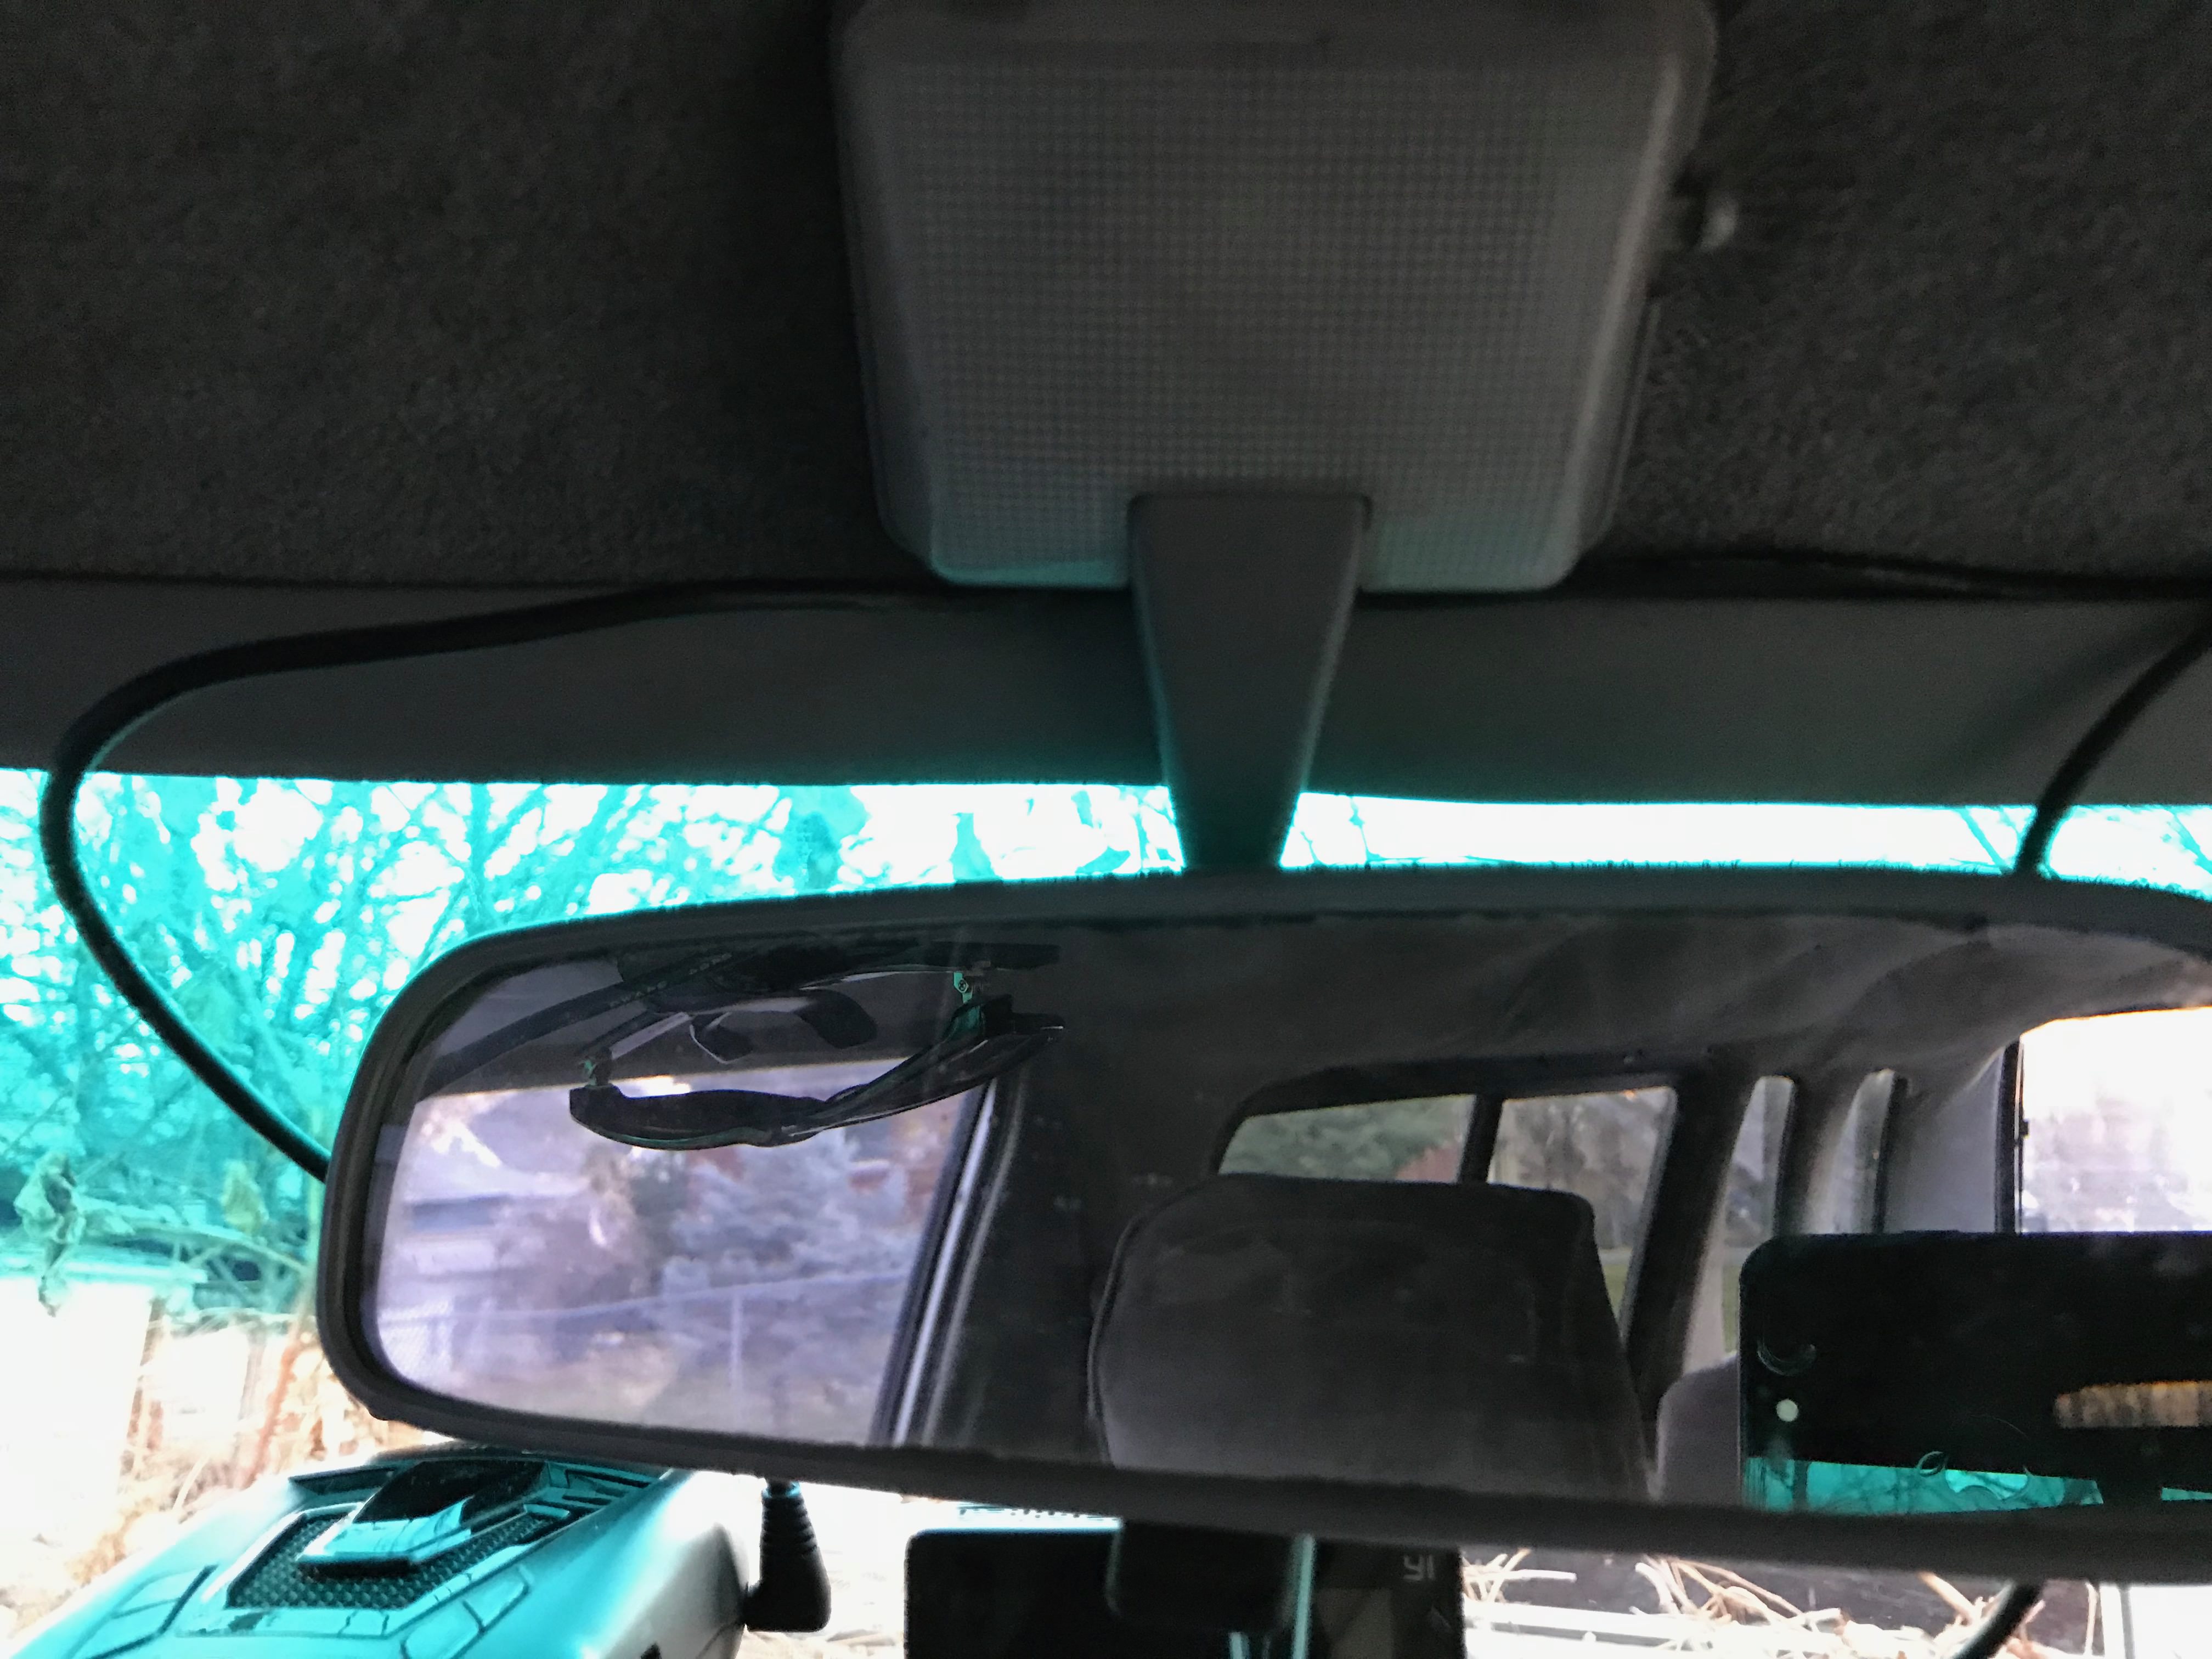 Hide the wiring along this rubber trim piece all the way to the right pillar
After that, I partially unscrewed the “oh shit!” handle, which allowed me to pry up the plastic trim along the pillar enough to disguise the cord on its length down and behind the dash. I ran it behind the dash and along the top of the foot well where the carpet ends.
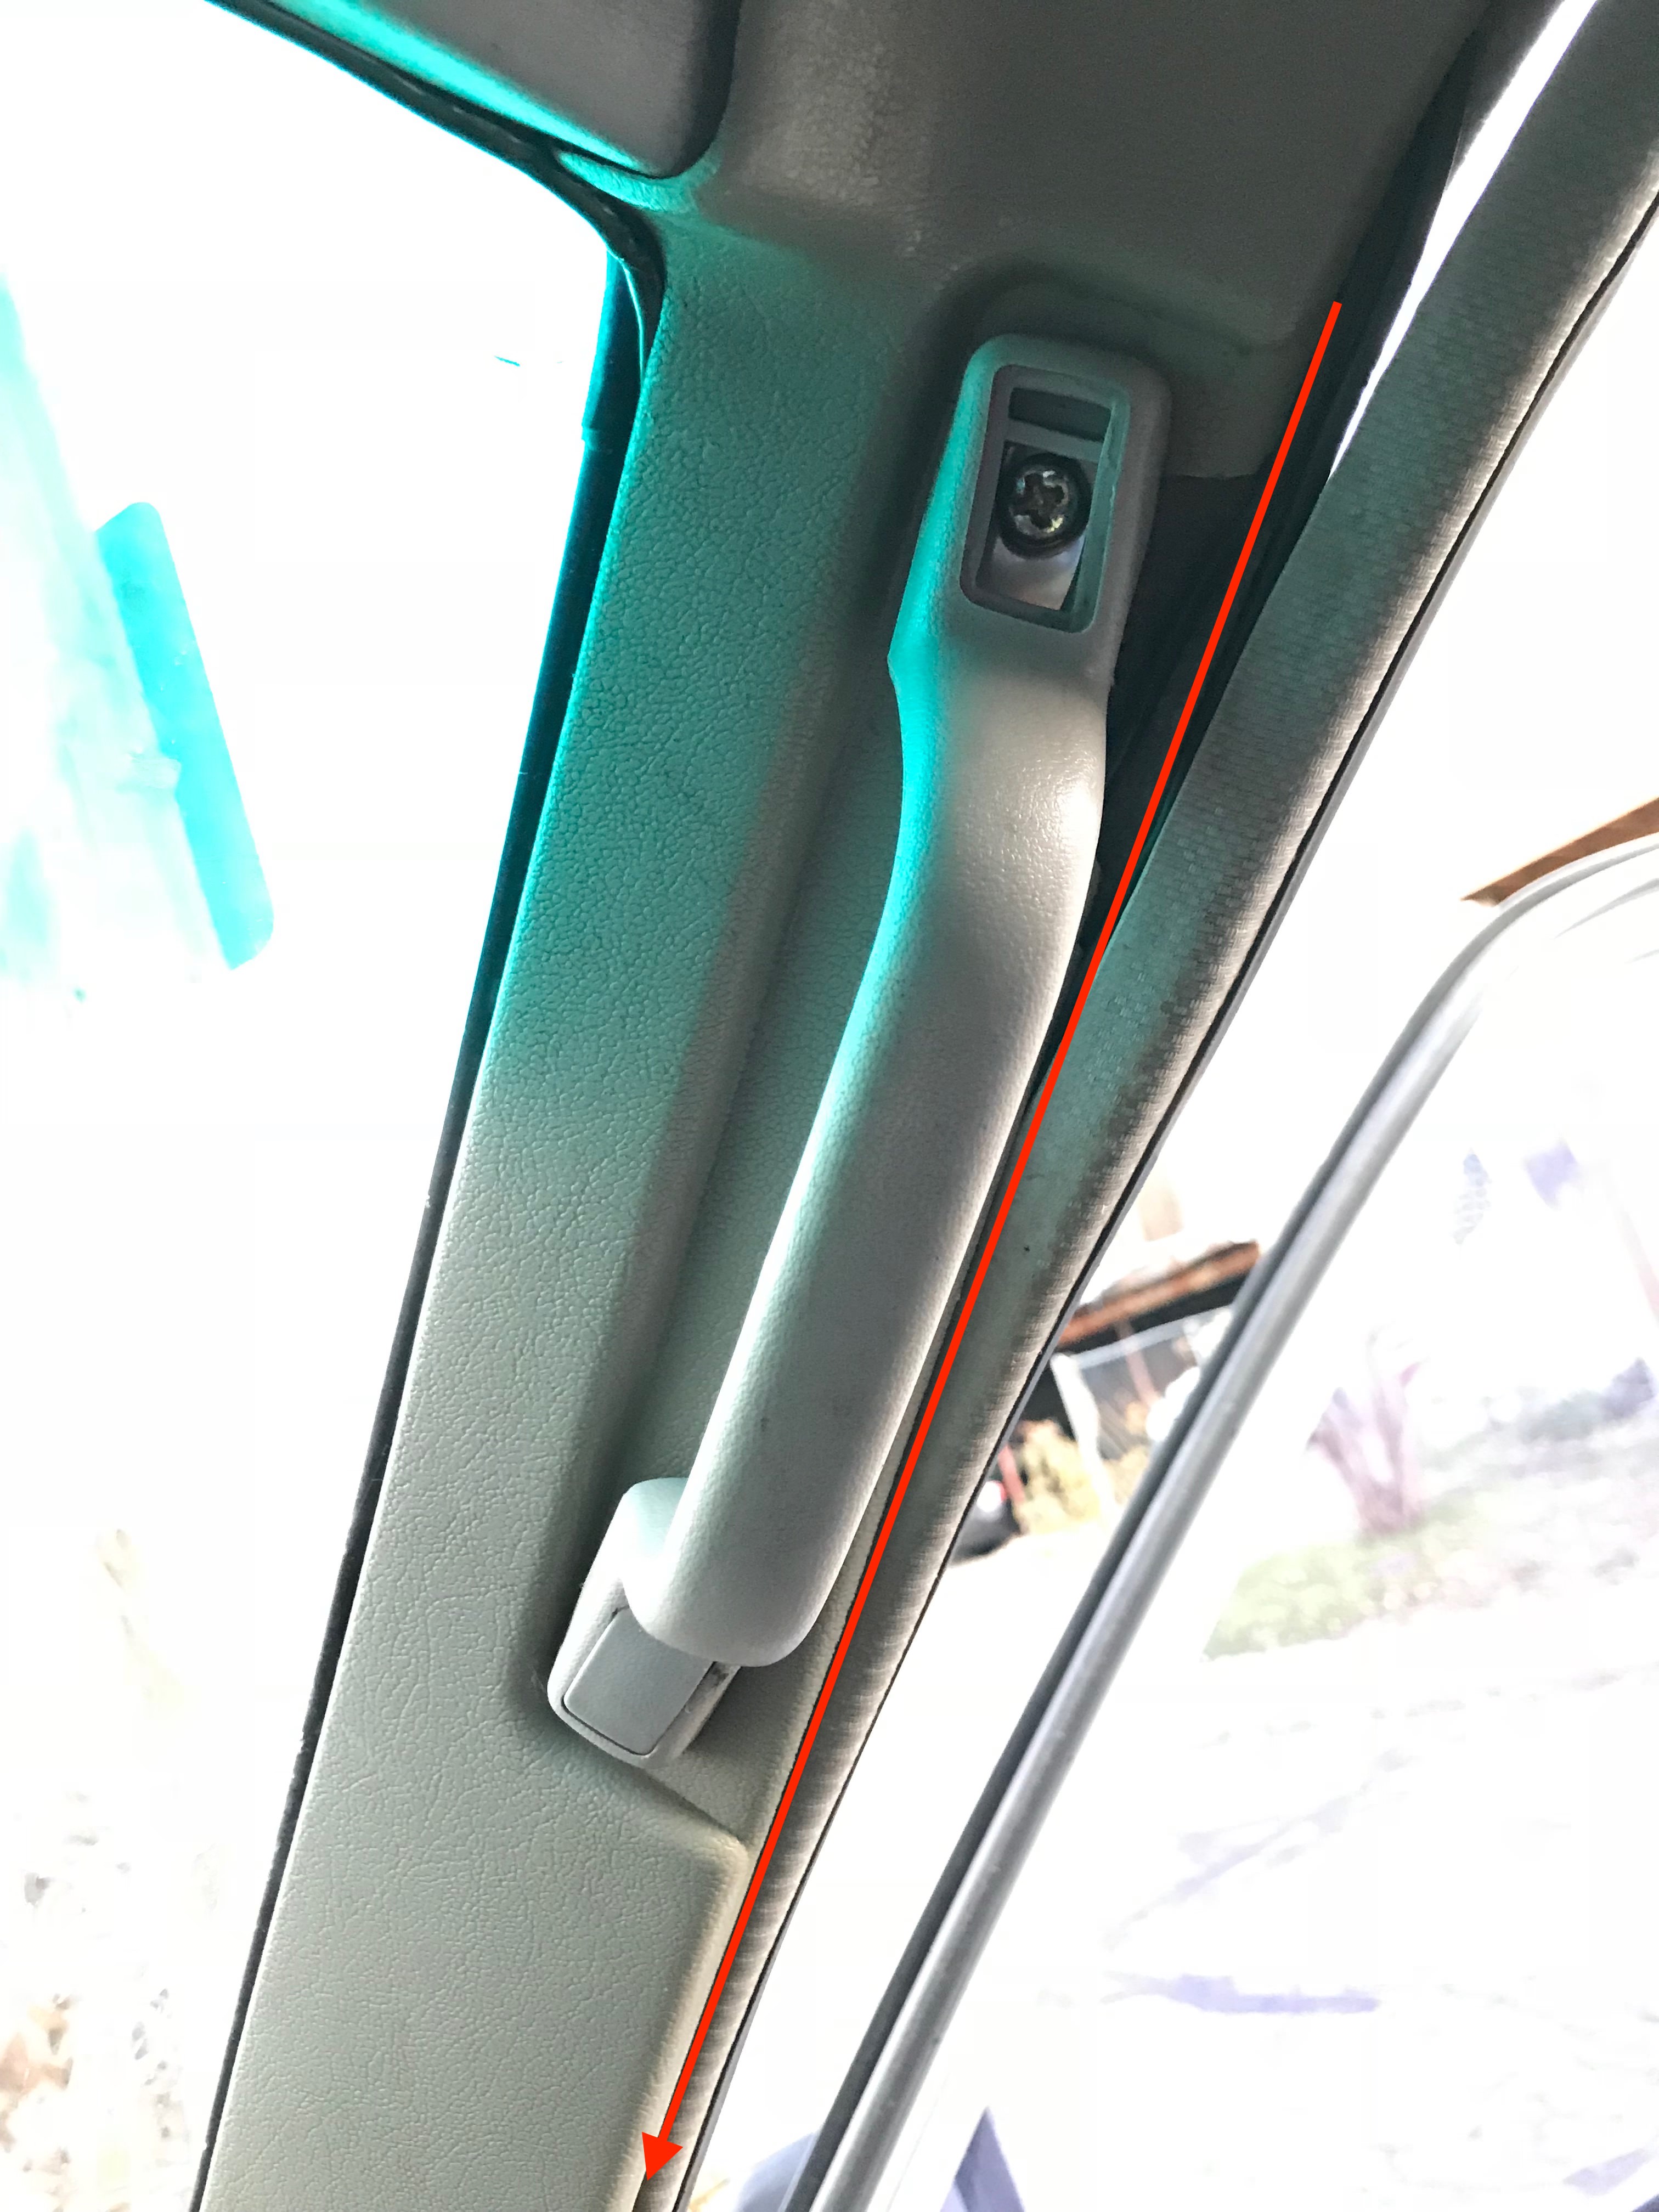 Pop off the plastic cover and loosen the screw so you can fit the wire under this trim piece
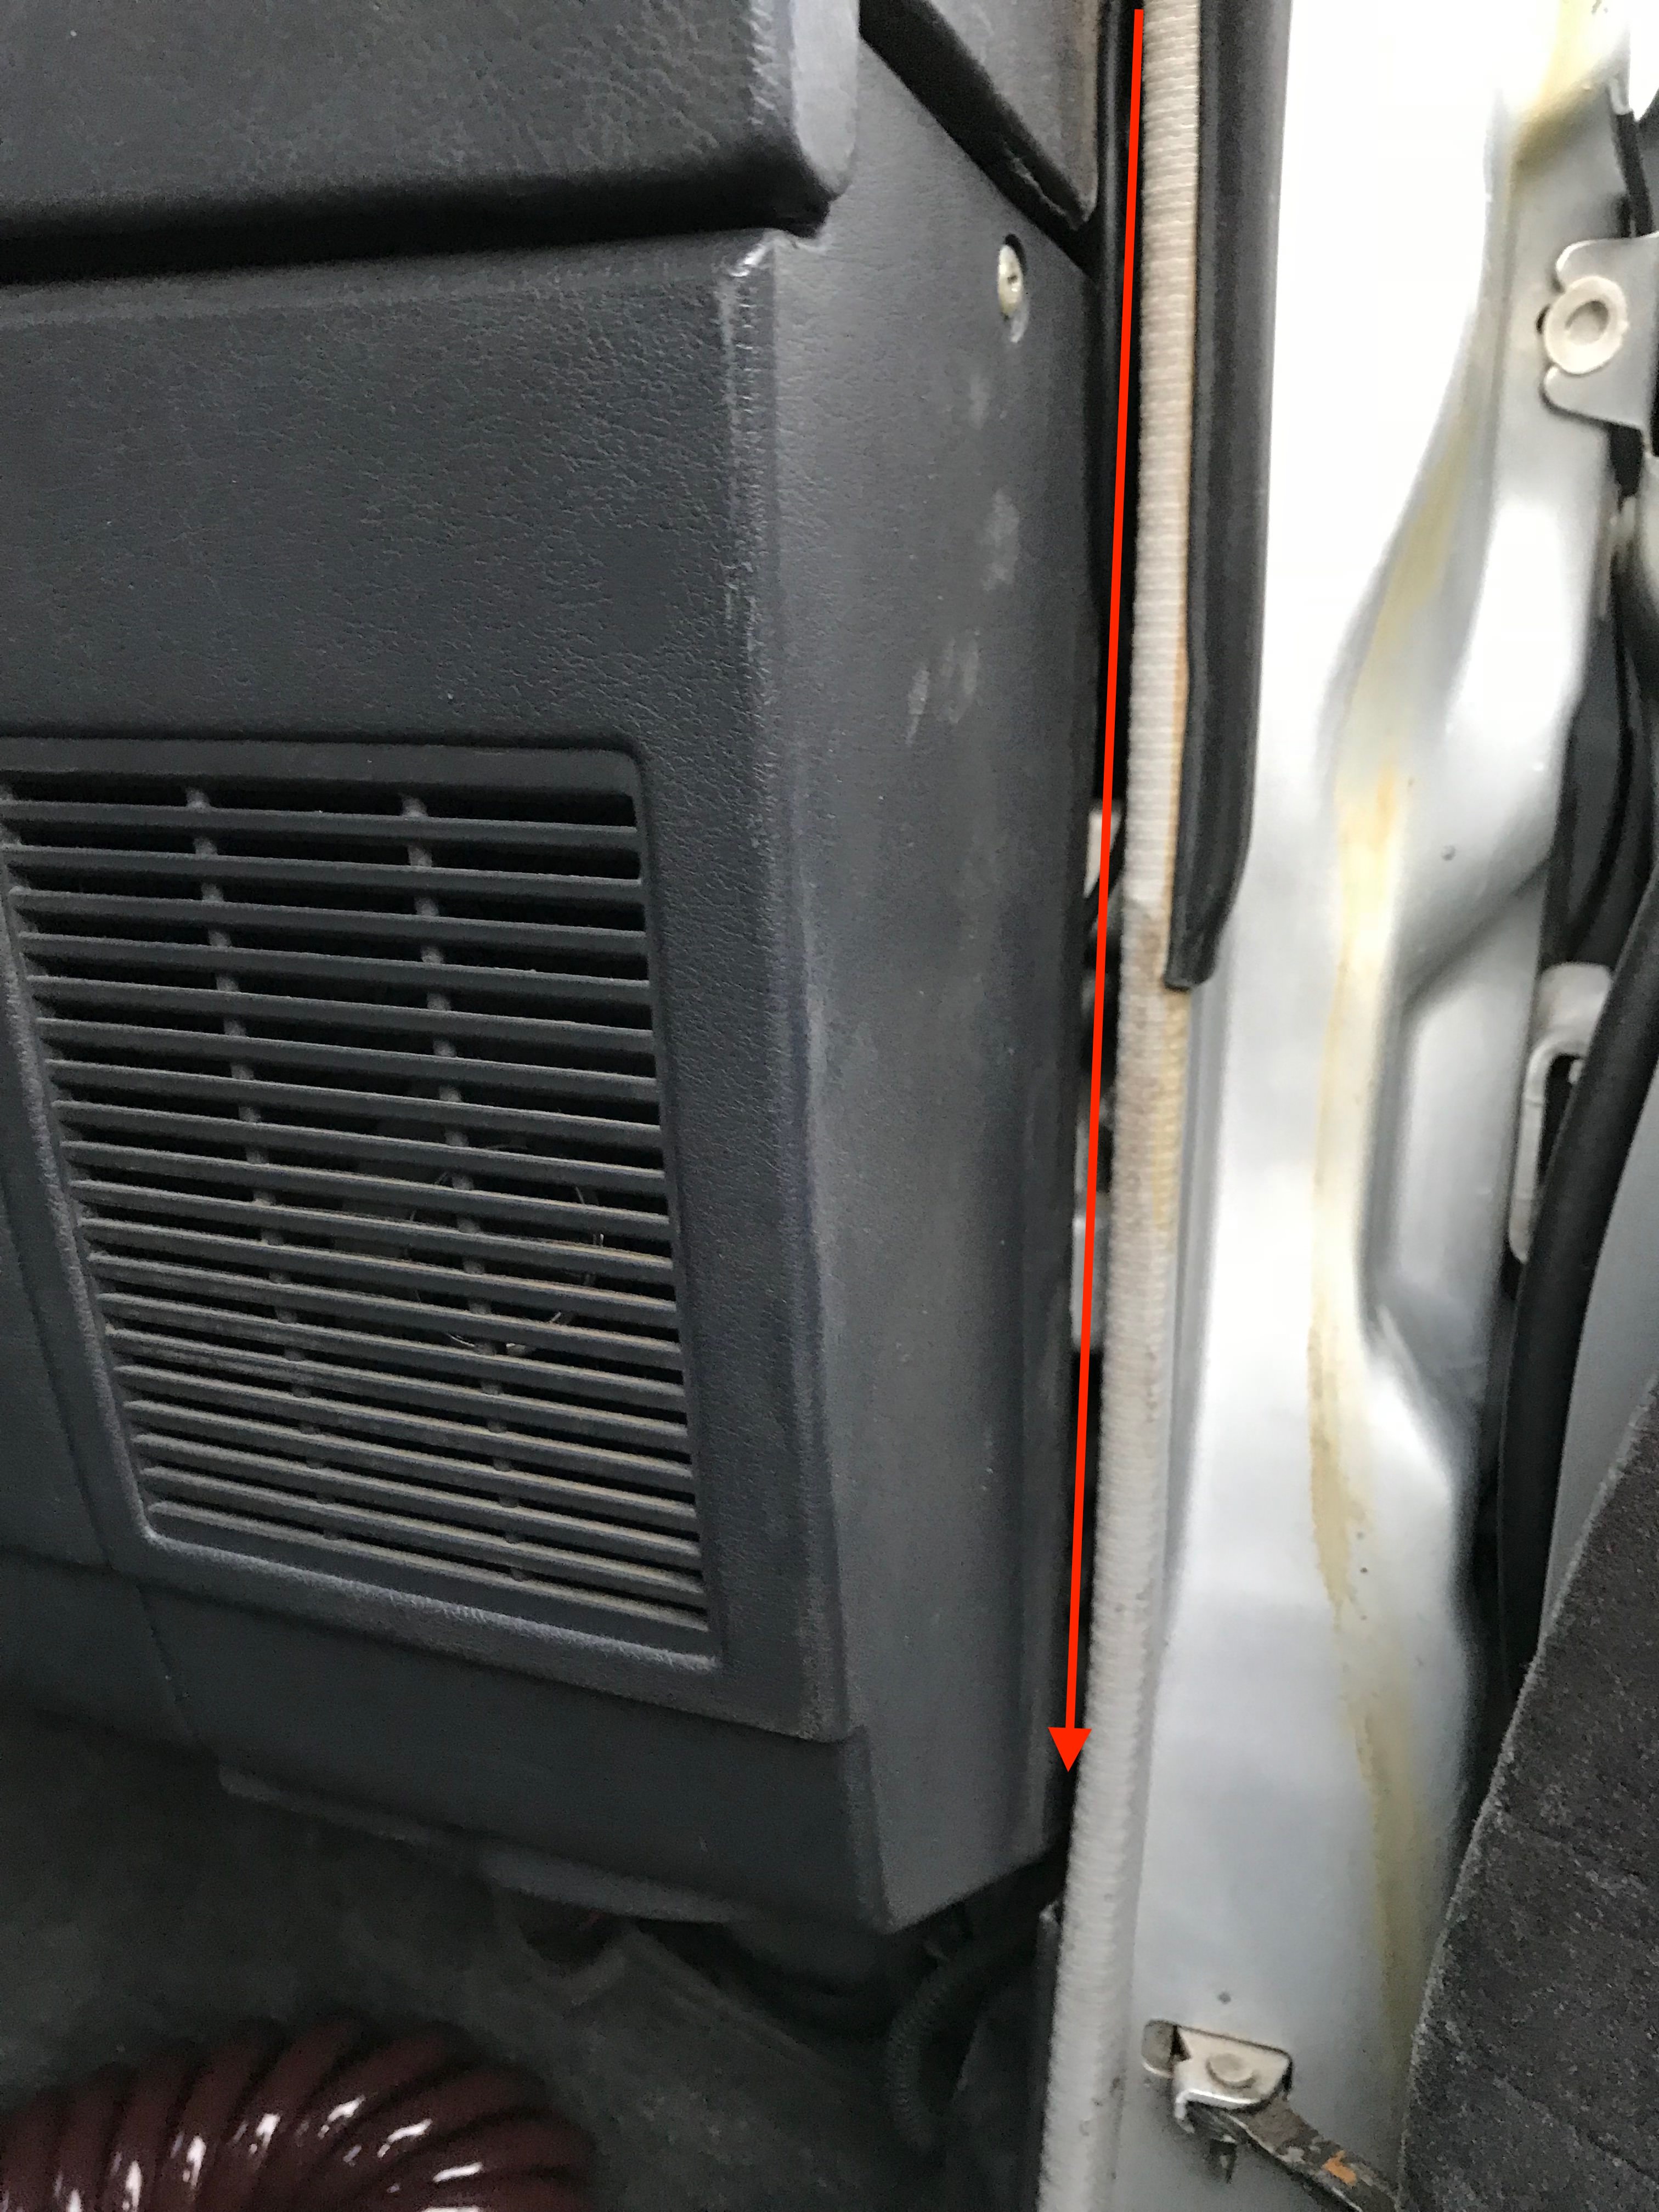 Conceal the wires easily along this seam
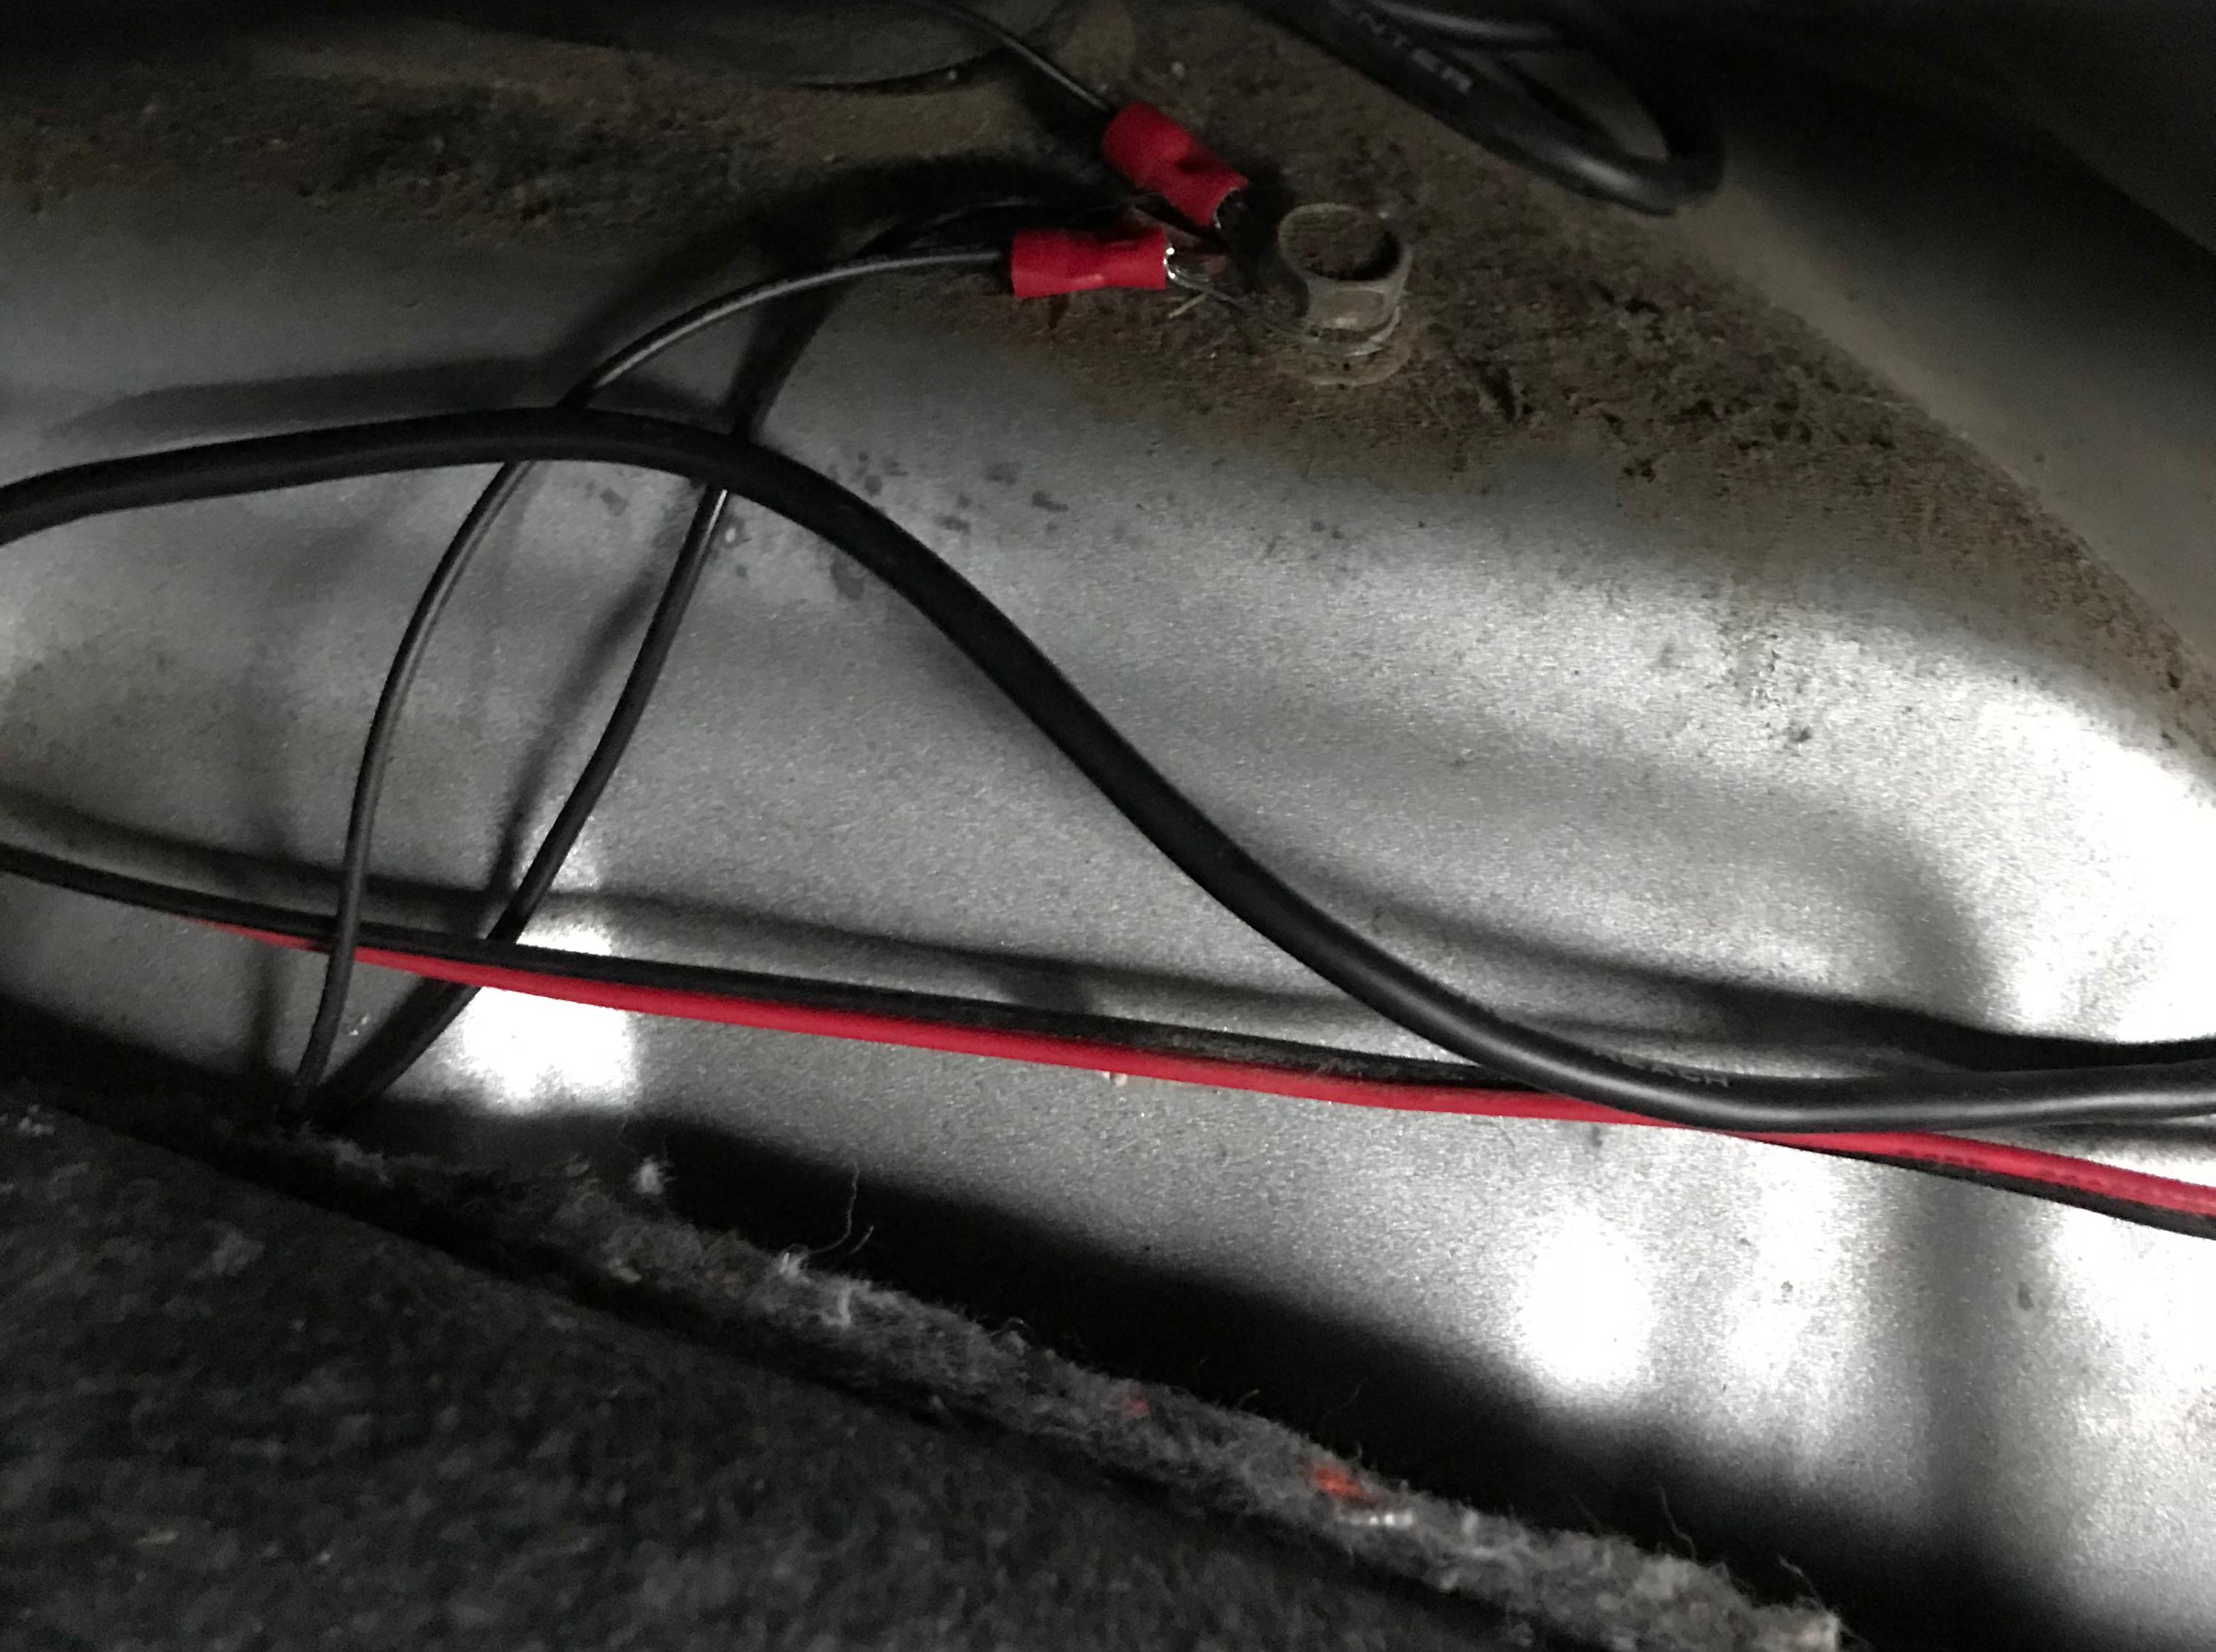 Perfect ground point just under the top edge of the carpet on the passenger side
After that, simply ground the black wire and connect the red wire to power. I tapped it into the cigarette lighter fuse since I already have a bunch of stuff like my gauges tapped into the stereo fuse. Any fuse that comes and stays on with the engine will work. Just make sure it’s not on a some odd fuse like a blinker circuit otherwise you’ll have to turn your blinkers on to turn on the camera, hehe. Heres how mine looks:
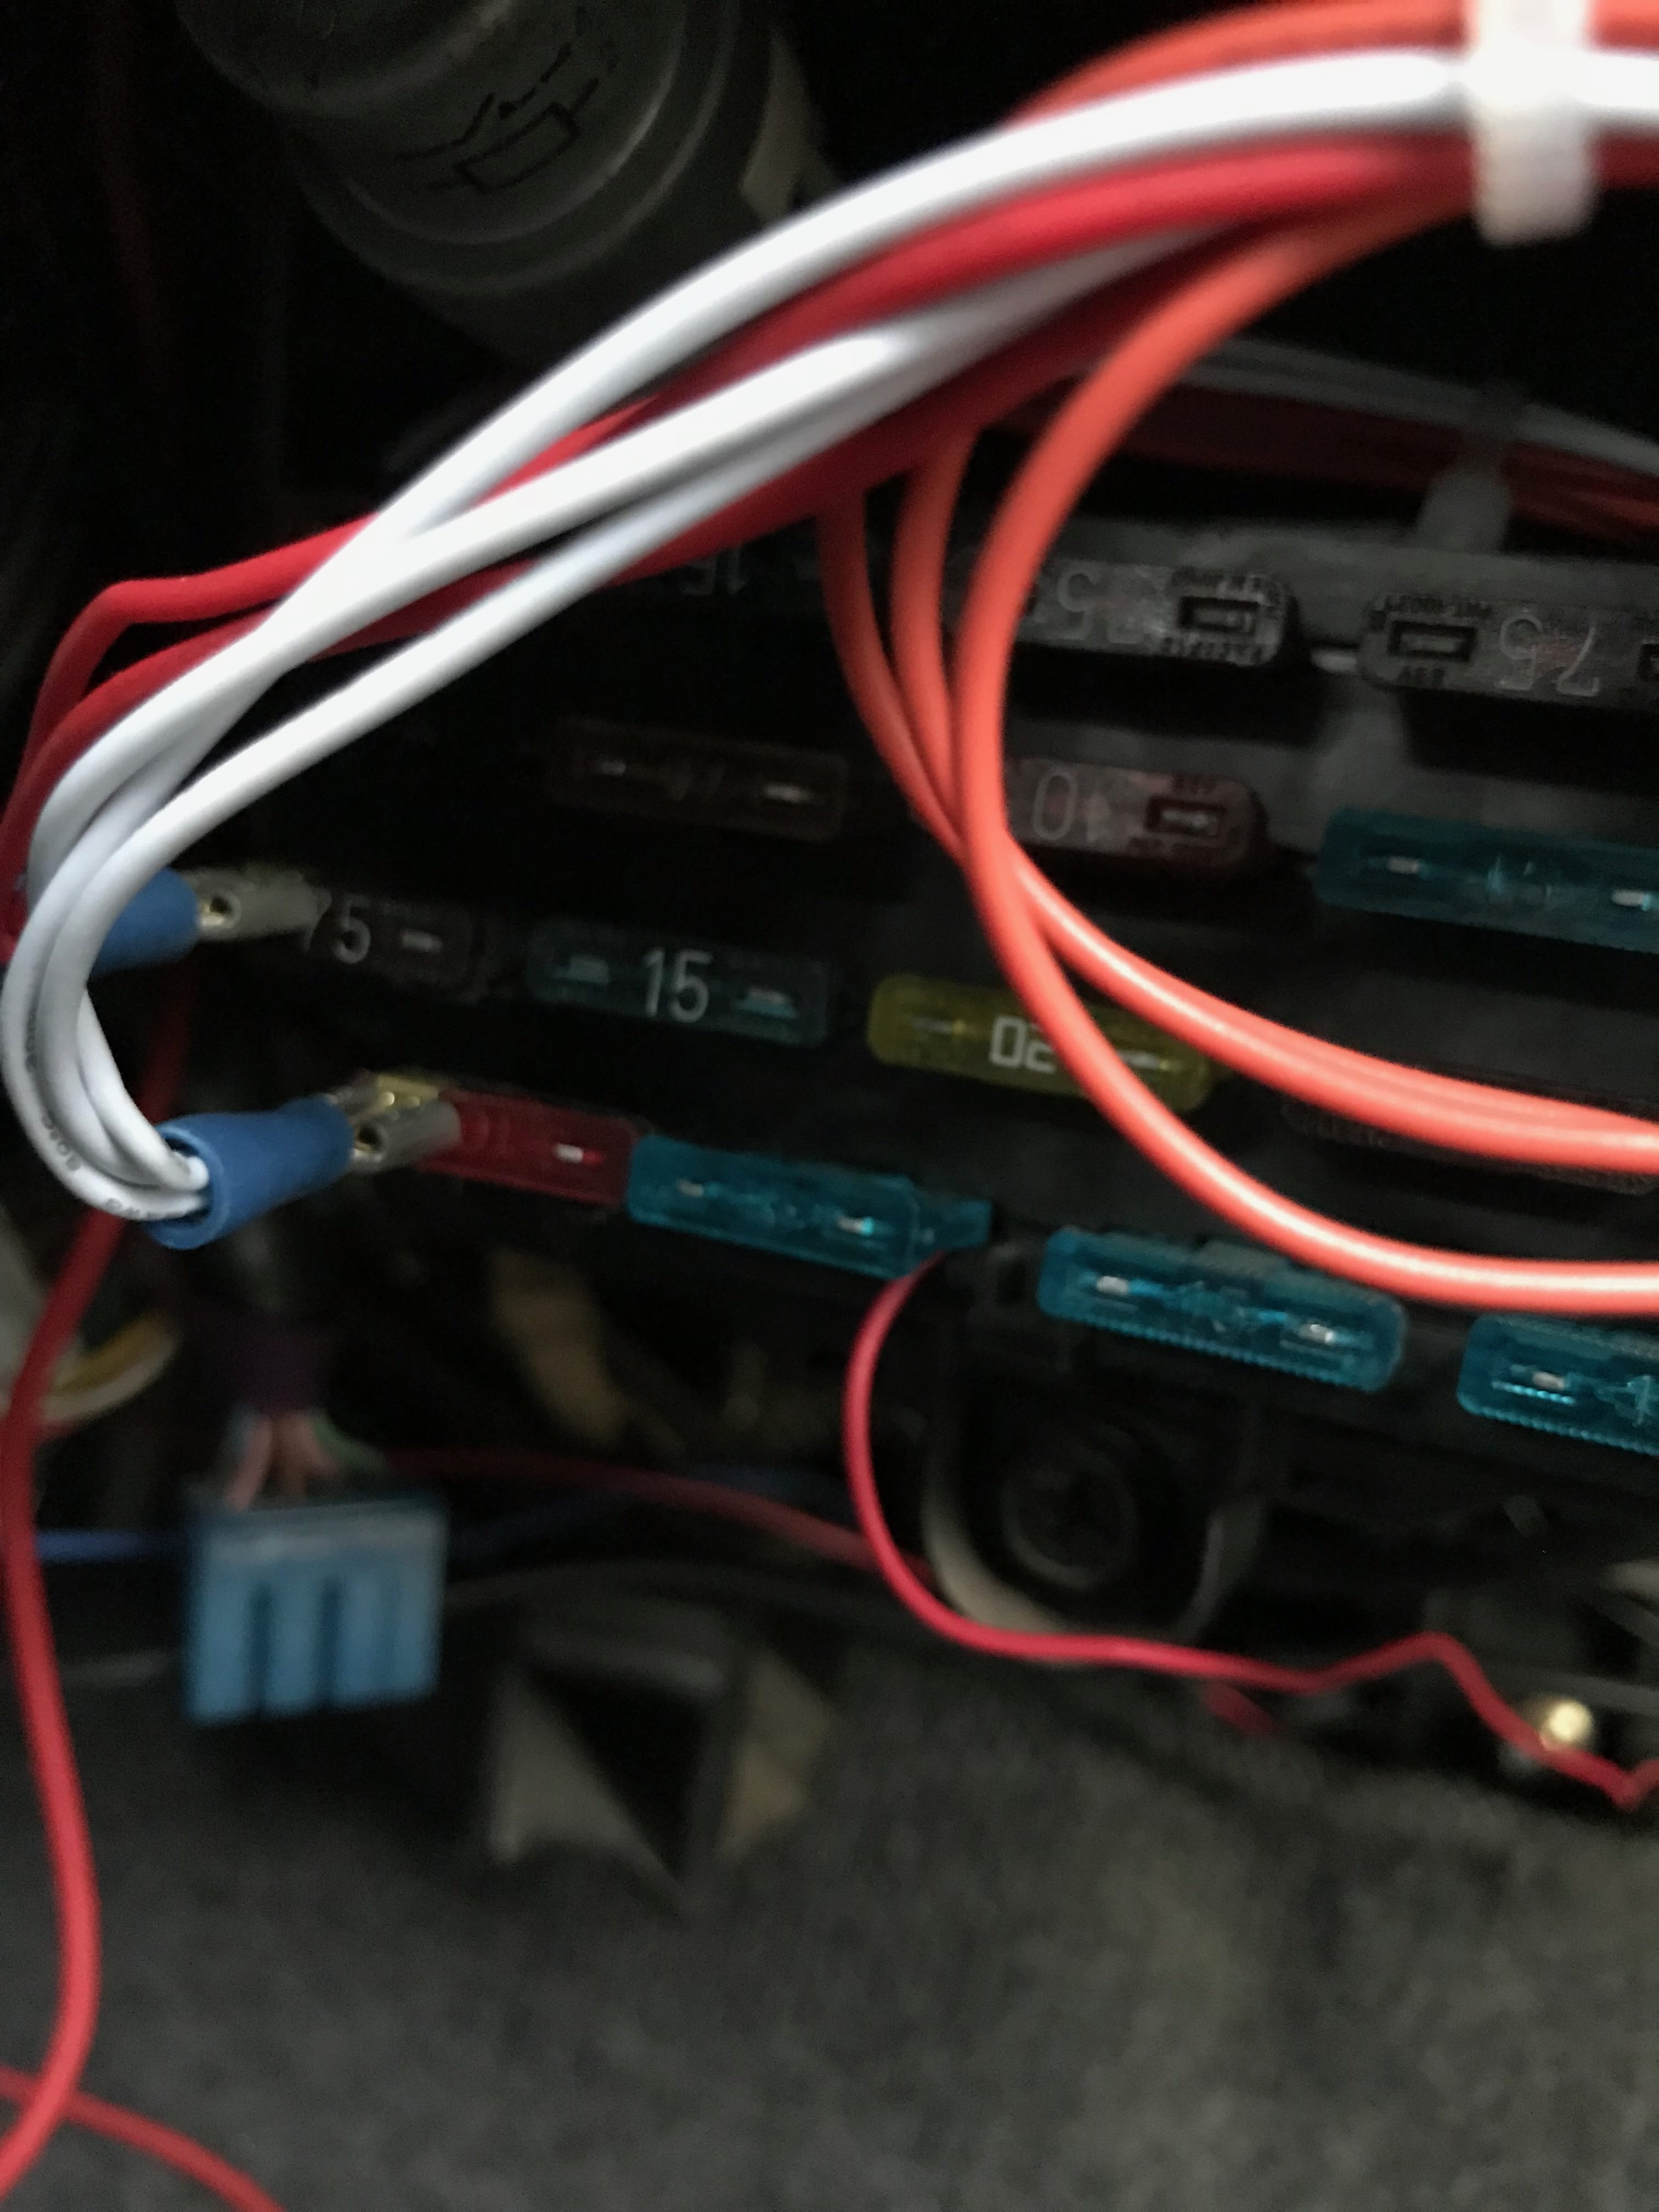 The dash cam is the single red wire running to the blue fuse. Any accessory fuse will work.
That’s all! You should be able to turn your key to accessory power now and see the camera come alive. Refer to your dash cams user manual to configure the clock and functions how you’d like and you’re off to the races. Here’s the finished setup with both my dash cam and radar detector installed – Sasquatch included:
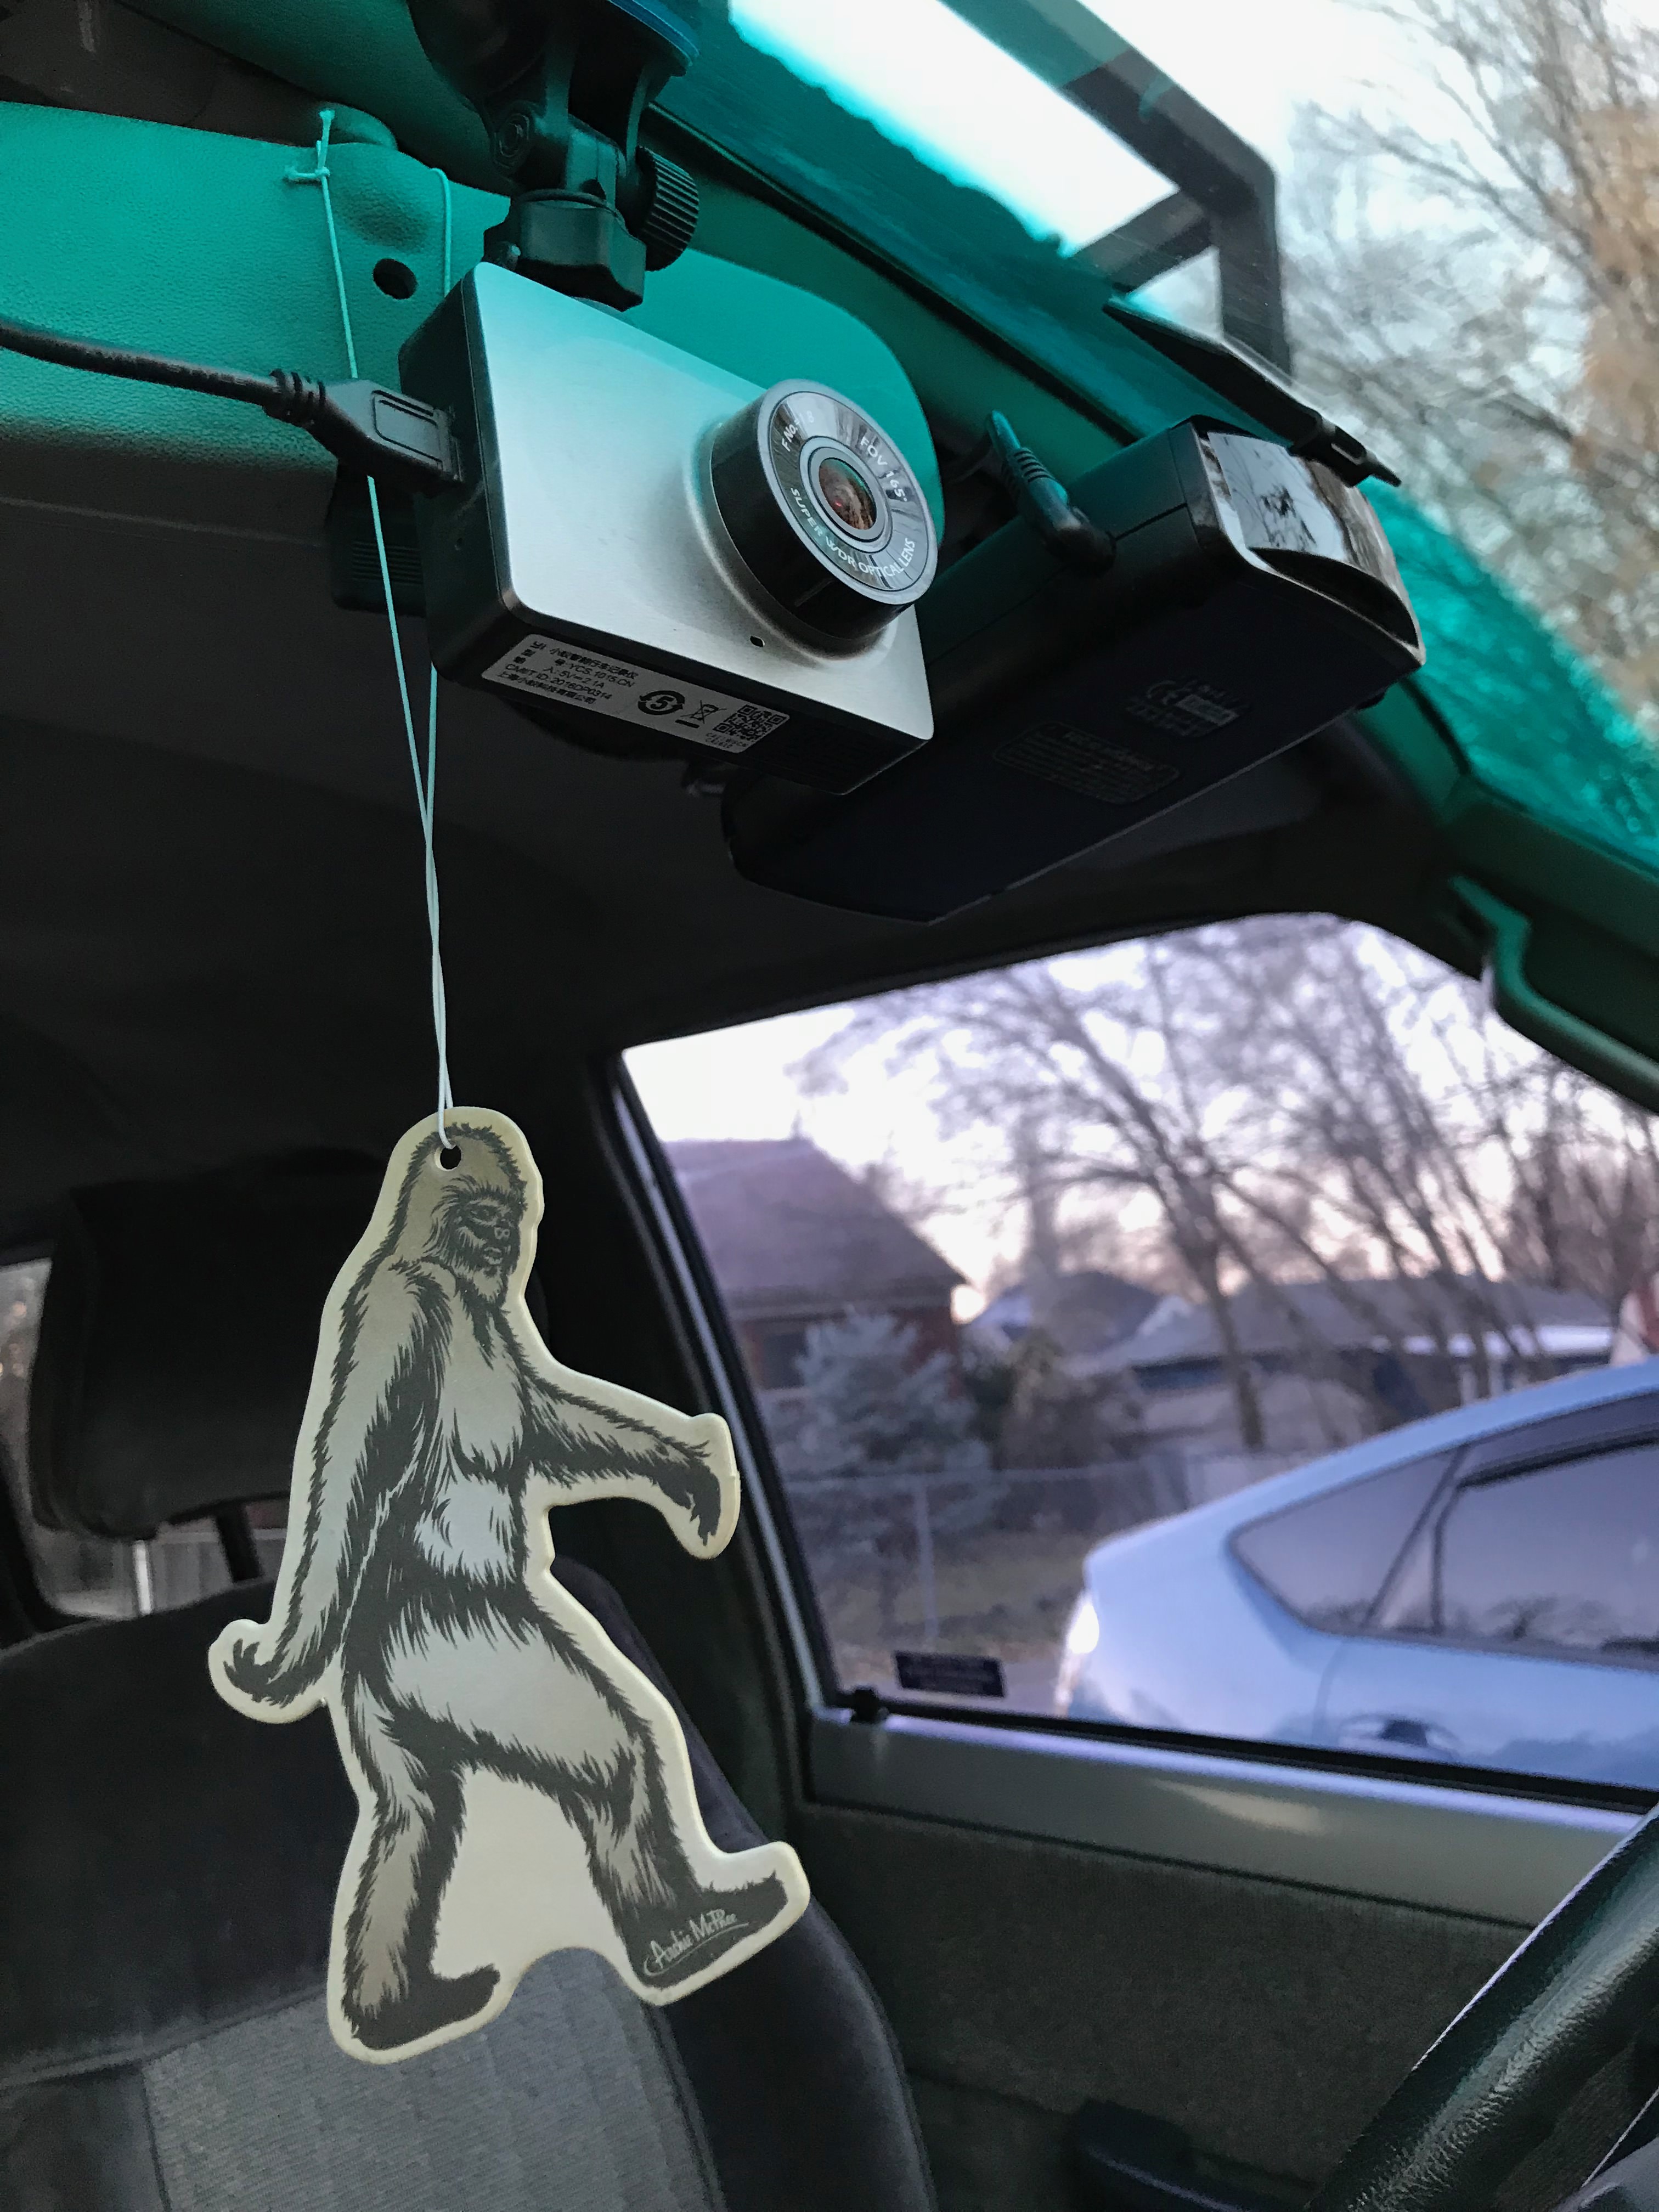 Radar detector and dash cam installed with hard wire kit. Sasquatch optional.
Let me know in the comments if you have any questions, or need recommendations or links to parts or products! I’m happy to help out!